Easy Halloween Food Ideas for Kids and Parties

Halloween food doesn’t have to be complicated to be fun! If you’re looking for easy Halloween food ideas for kids, classroom parties, Halloween parties, or a spooky family night, I’ve got you covered with simple treats and snacks that are as fun to make as they are to eat.

These Halloween recipes use easy-to-find ingredients and plenty of shortcuts, so you don’t have to spend hours in the kitchen creating elaborate Halloween treats. From adorable cookie bats and cheesy cheese stick broomsticks to easy Halloween snack cups that are perfect for parties, there’s something here for every Halloween celebration.
You’ll also find spooky twists on classic favorites, including deviled egg ghosts, Halloween brownies, and other fun Halloween treats that kids will love. Some are sweet, some are savory, and all are designed to be easy enough for busy parents to make.
Whether you’re putting together a Halloween party spread, looking for a fun classroom snack, making treats for trick-or-treat night, or just want to make dinner a little more festive, these easy Halloween food ideas are sure to be a hit.
So grab your Halloween sprinkles, candy, cheese sticks, and cookie cutters, and let’s make some spooky food! 🎃👻🦇
1. Halloween Treat Cups
If you’re throwing a Halloween party, here’s a super easy way to make individual grab-and-go snack cups that are just as cute as they are practical!
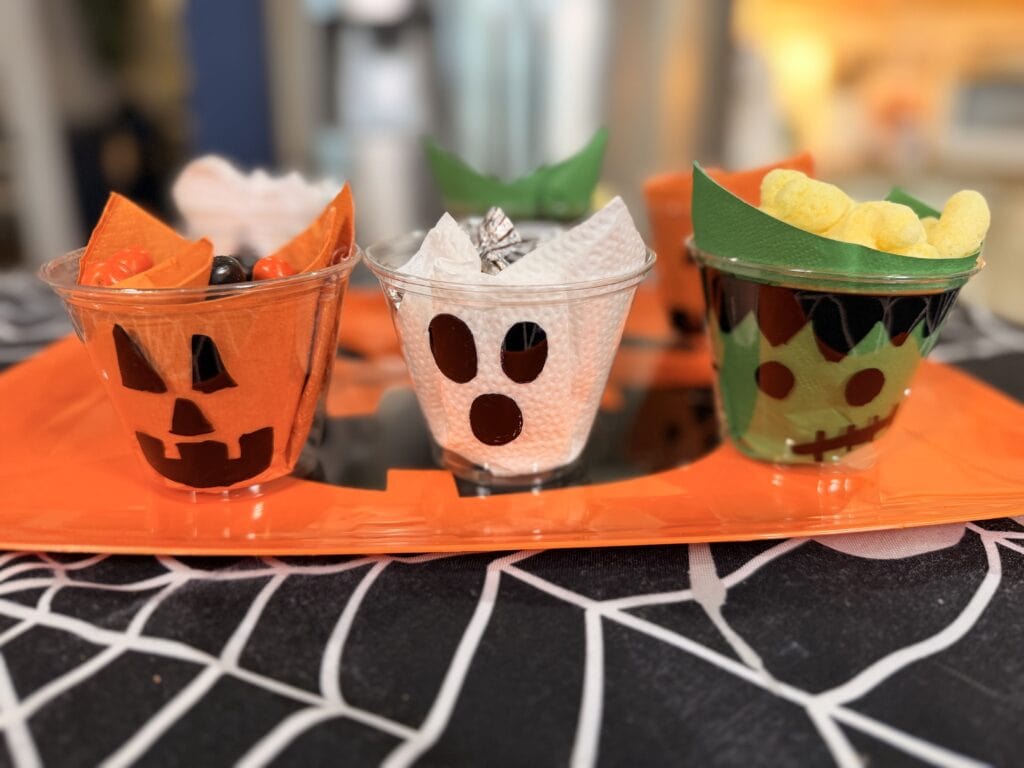
All you need are clear plastic cups, colored napkins, a black marker, and your favorite snacks!
- 🎃 Jack-o’-lantern: Draw a Jack-o’-lantern face on the cup and line it with an orange napkin.
- 👻 Ghost: Draw a spooky ghost face and line the cup with a white napkin.
- 💚 Frankenstein: Draw Frankenstein’s face and line the cup with a green napkin.
Then fill each cup with your favorite Halloween snacks—popcorn, pretzels, candy, chips, fruit, or whatever you’re serving!
Set them out and let everyone grab a cup and go!
2. Ghost Deviled Brownies
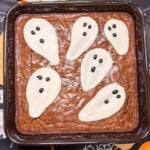
Okay, these might be one of my favorite Halloween treats yet! They LOOK like little deviled eggs, but they’re actually delicious chocolate brownies topped with spooky little ghosts!
And they’re surprisingly easy to make!
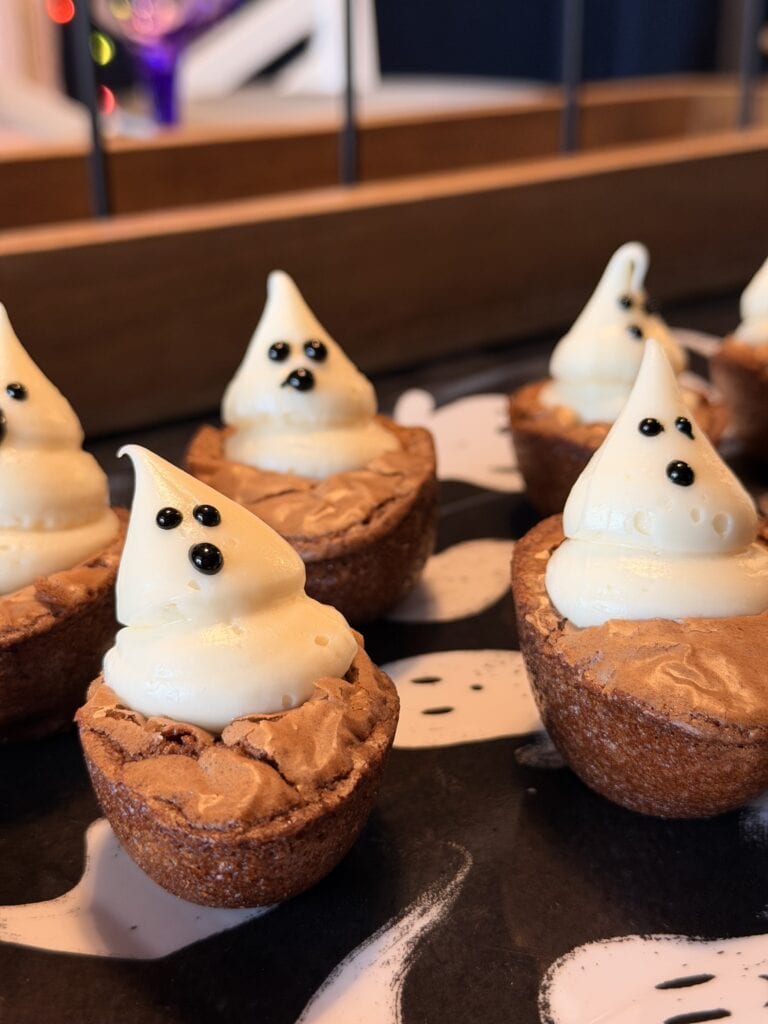
- Mix up one box of brownie mix according to the package directions.
- Spray a silicone egg mold with nonstick spray and fill each cavity with brownie batter.
- Bake at 350°F for about 20 minutes, or until the brownies are baked through.
- As soon as they come out of the oven, press a ½ tablespoon measuring spoon into the center of each brownie to make a little indentation.
- Let the brownies cool completely.
- Pipe vanilla icing into each indentation in two dollops to make a little ghost shape.
- Pop them into the refrigerator for about 5 minutes to let the icing set.
- Finish your ghosts with little eyes and mouths using black icing.
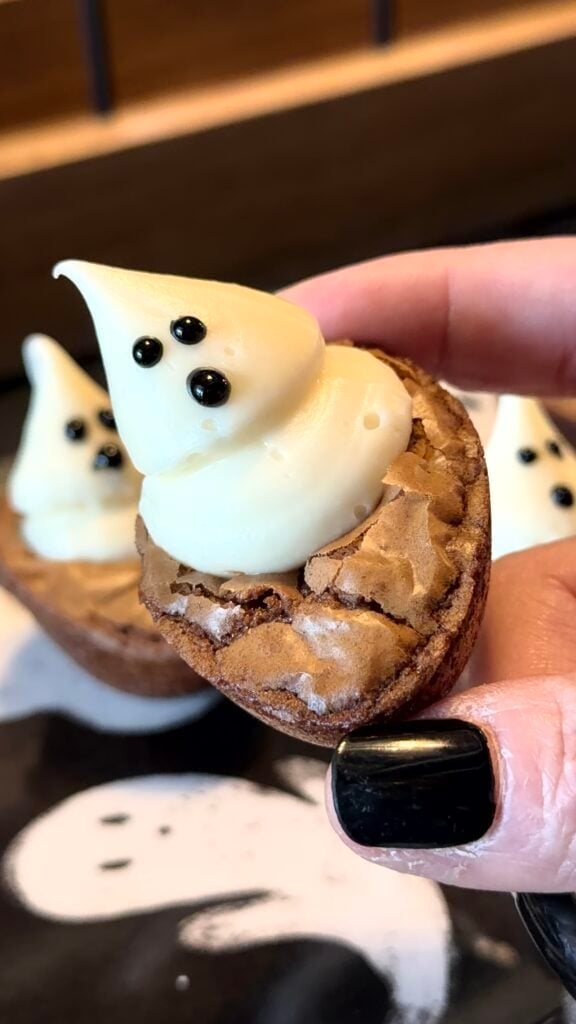
And there you have it—ghostly “deviled eggs” that are actually brownies!
These would be SO fun for a Halloween party, spooky dessert table, or just a fun treat to surprise the kids with!
3. Oreo Bats
These little bat treats are SO cute and they’re ridiculously easy to make! No baking required and the kids can help put them together. 👻
All you need is Oreos, mini Reese’s, melted chocolate or icing, and candy eyes!
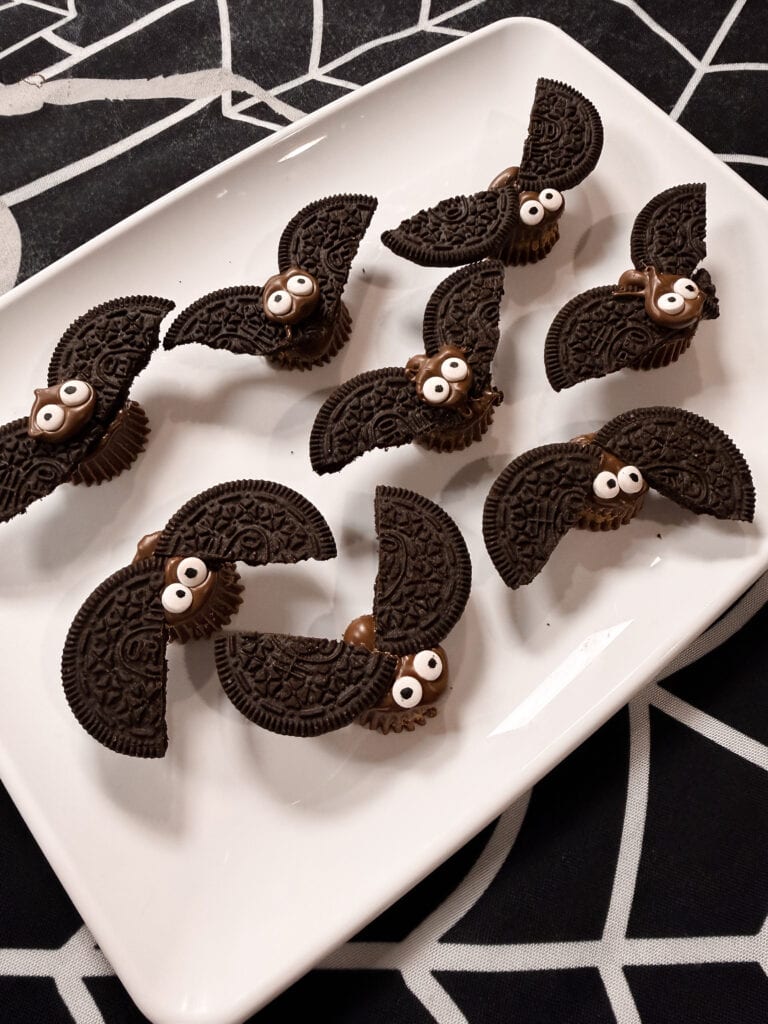
🦇 Here’s how to make them:
- Carefully pull apart an Oreo and remove the icing.
- Cut the Oreo cookies in half to make the bat wings.
- Place a small dot of melted chocolate or icing on the bottom of a mini Reese’s.
- Arrange the two Oreo halves on the chocolate to create the bat wings.
- Add two candy eyes while the chocolate or icing is still soft.
- Let everything set and then your little chocolate bats are ready to fly! 🦇
4. Cheese Stick Broomsticks
All you need is mozzarella cheese sticks, pretzel sticks, and fresh chives!
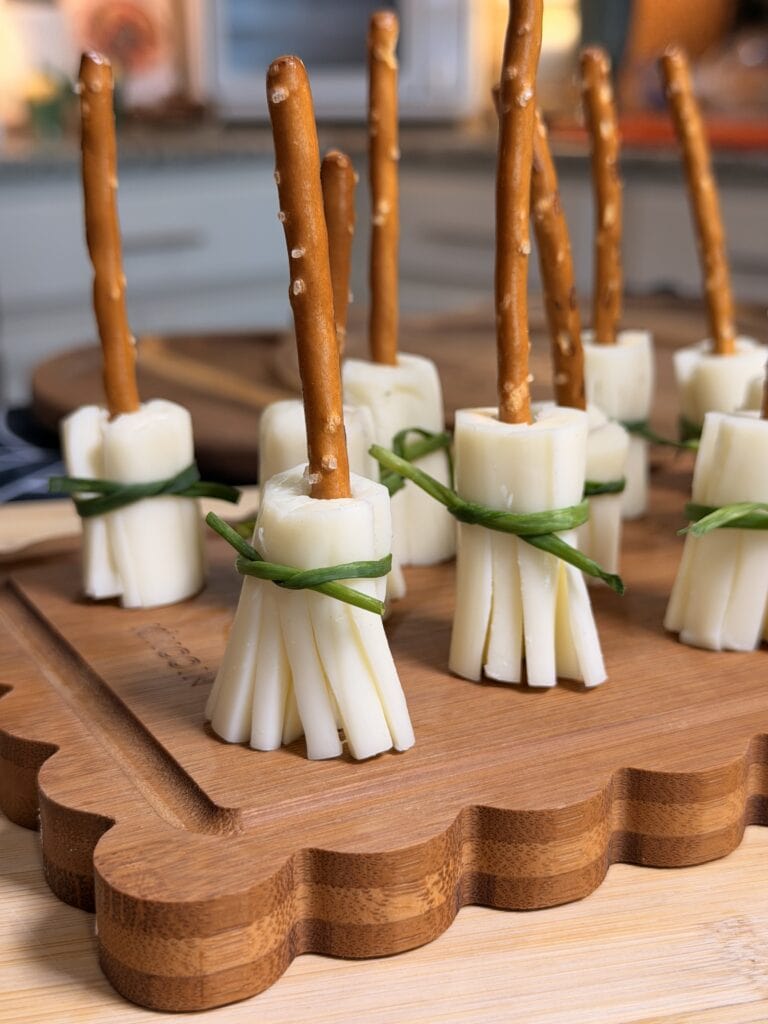
- Cut a mozzarella cheese stick into 3 equal pieces.
- On one end of each piece, make 4 cuts into the cheese, going about halfway up.
- Turn the cheese stick and make 4 more cuts on the other side, creating the broom bristles.
- Stick a pretzel stick into the uncut end to make the broom handle.
- Gently tie a chive around the cheese where the bristles meet the handle.
5. Fall Candy Corn Pretzel Treats
If you need a quick little fall treat, you have to try these! They’re sweet, salty, crunchy, and take just a few minutes to make.
You only need square pretzels, HUGS Striped Hershey’s Kisses, and candy corn! 🍫🌽
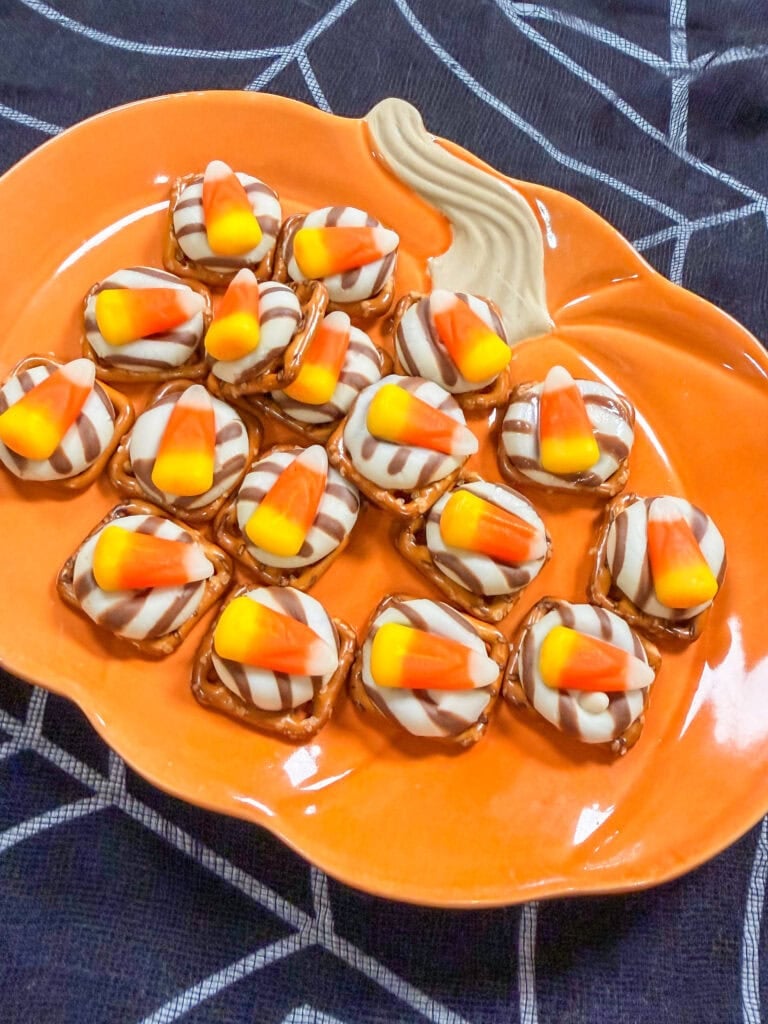
- Place square pretzels on a parchment-lined sheet pan.
- Place a HUGS Striped Hershey’s Kiss on top of each pretzel.
- Bake at 350°F for 3–4 minutes, just until the chocolate is softened. You don’t want it completely melted!
- Immediately press a candy corn into the softened chocolate.
- Pop the whole tray into the refrigerator until the chocolate is completely set.
6. Witch’s Broomsticks
These chocolate broomsticks are typically make with mini Reese’s peanut butter cups, but we know a lot of friends with peanut allergies, so I like to use Hershey Kisses instead.
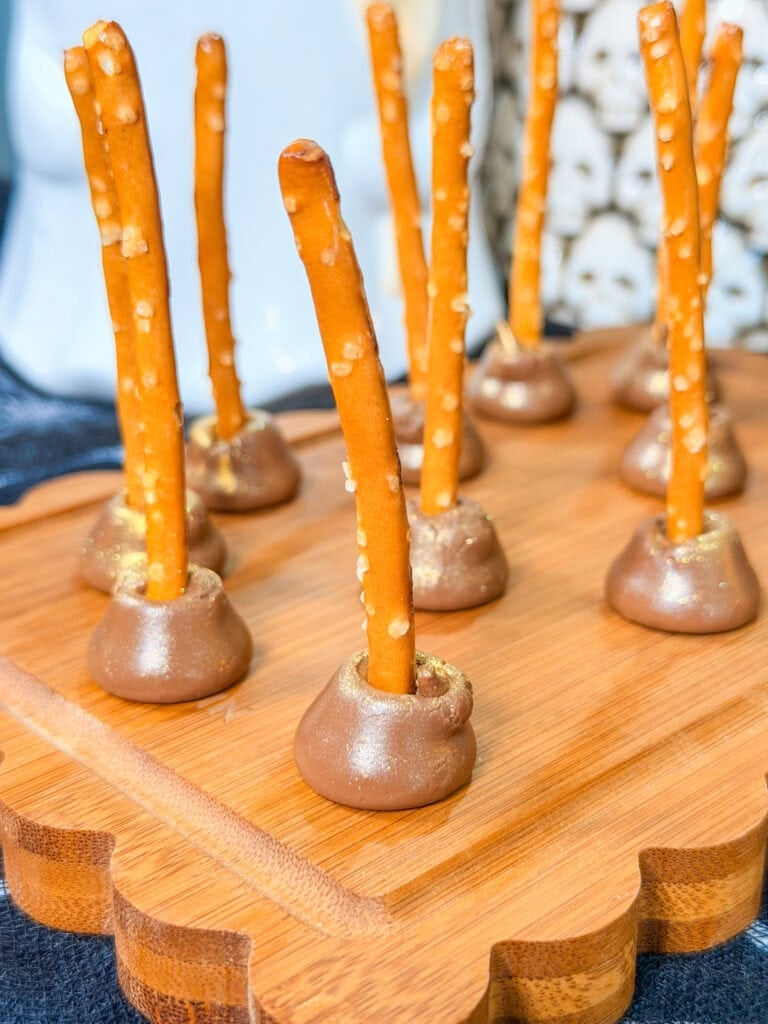
- Place Hershey’s Kisses on a parchment-lined sheet pan.
- Bake at 350°F for 3–4 minutes, just until the chocolate is softened. Keep an eye on them—you don’t want them completely melted!
- Immediately press a pretzel stick into the softened chocolate to make the broomstick handle.
- Let the chocolate set completely. You can pop them in the fridge to speed things up!
- Optional: Once set, give the chocolate kisses a light spray of edible gold powder for a little extra Halloween sparkle.
7. White Chocolate Ghosts
These little chocolate ghosts are SO easy to make and are the perfect spooky addition to all your Halloween treats! 🎃
You only need white chocolate, candy melts or almond bark + black icing!
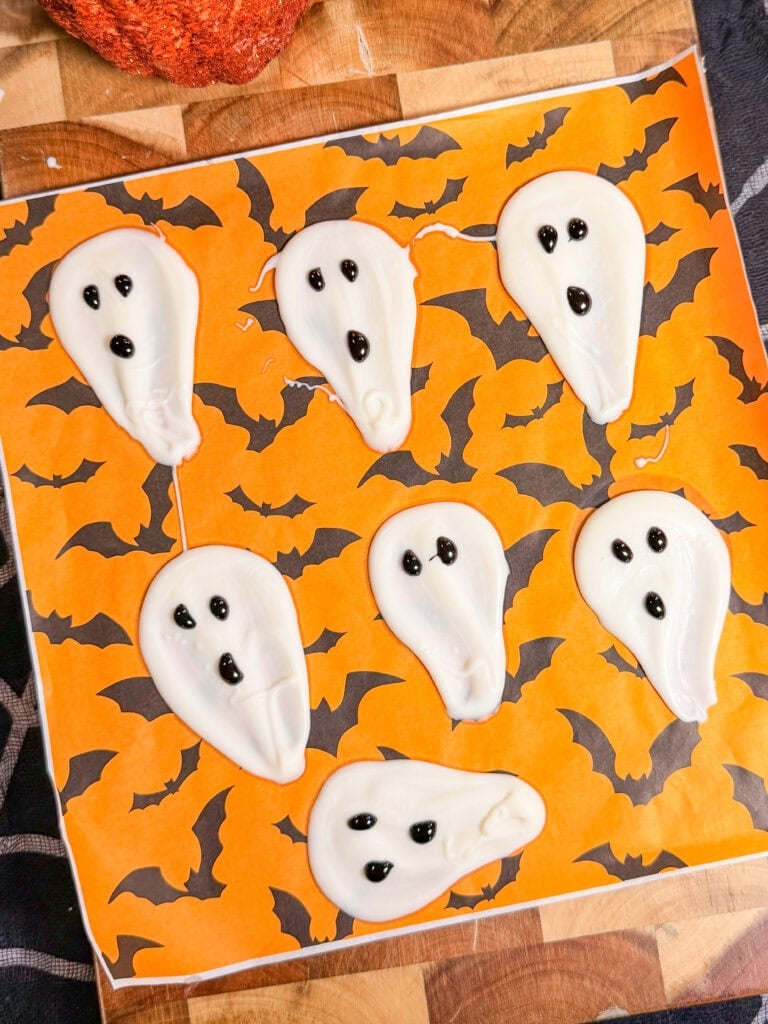
Here’s how to make them:
- Melt your white chocolate, white candy melts, or almond bark according to the package directions.
- Spoon a dollop of melted chocolate onto wax paper or parchment paper.
- Use the back of the spoon to gently shape the chocolate into a little ghost shape.
- Place in the refrigerator until the chocolate is completely set.
- Use black icing to add two eyes and a little spooky mouth.
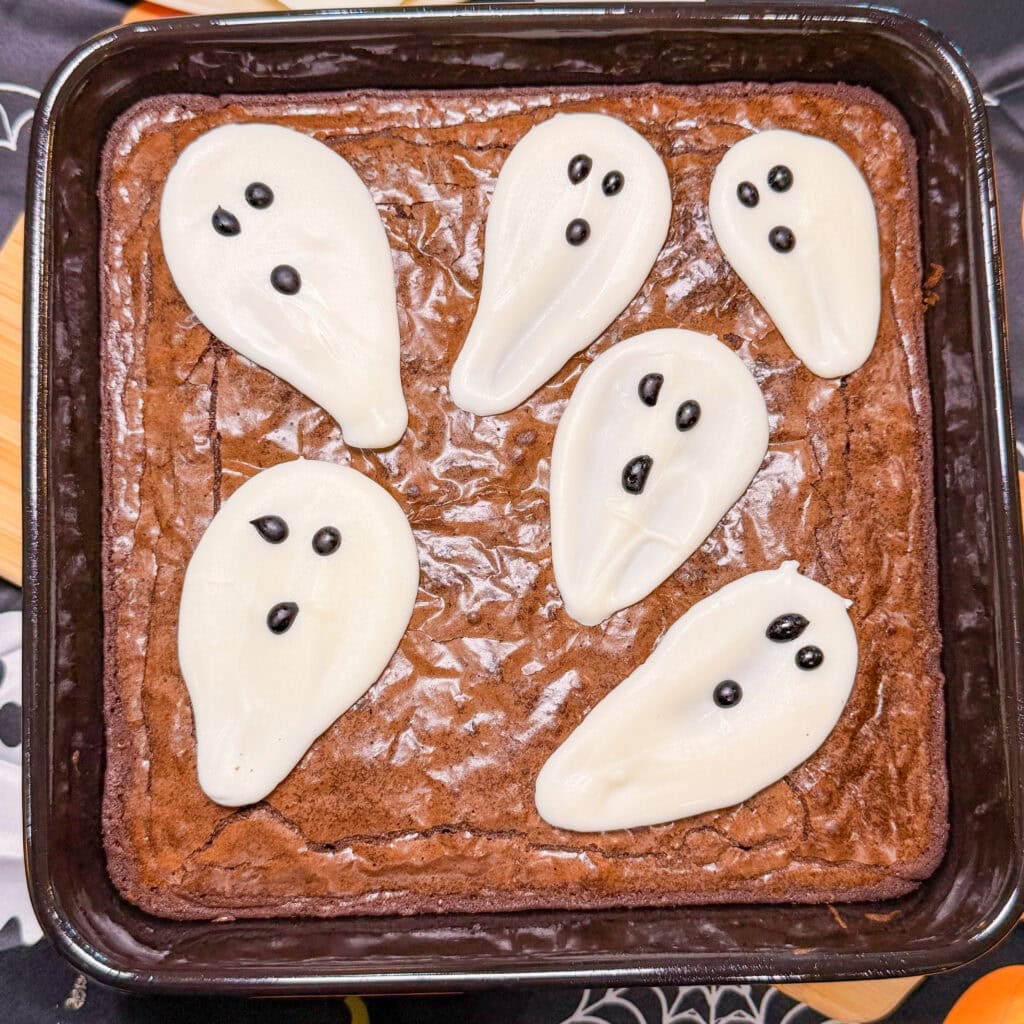
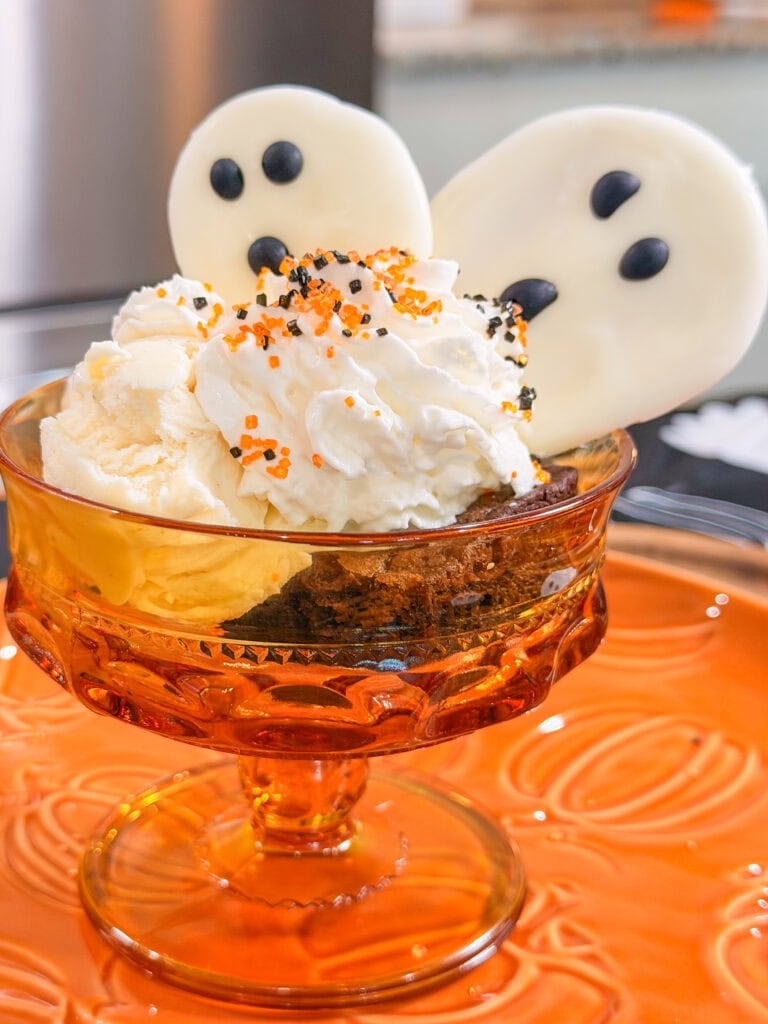
Now comes the fun part—you can use these little ghosts ALL over your Halloween treats!
👻 Add them to a “boo-cuterie” board
🍫 Put them on top of brownies
☕ Use them to decorate Halloween hot chocolate
🍦 Add them to an ice cream sundae
Such an easy little Halloween DIY that makes everything instantly more festive! 🧡
8. Melting Witch Brownies
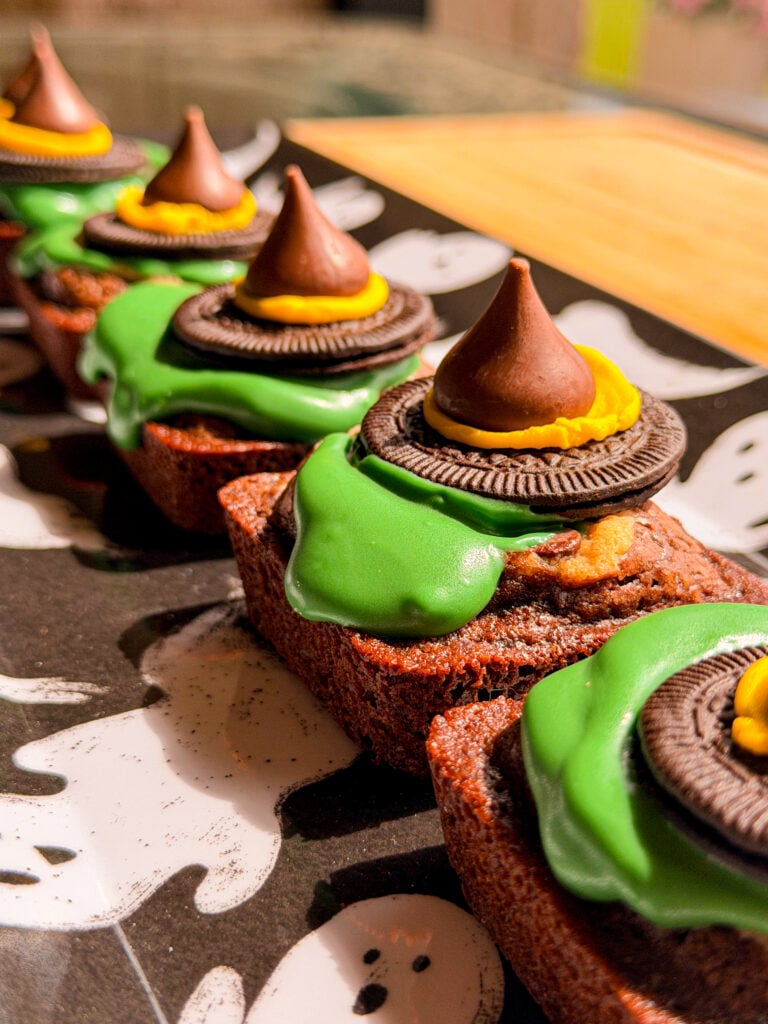
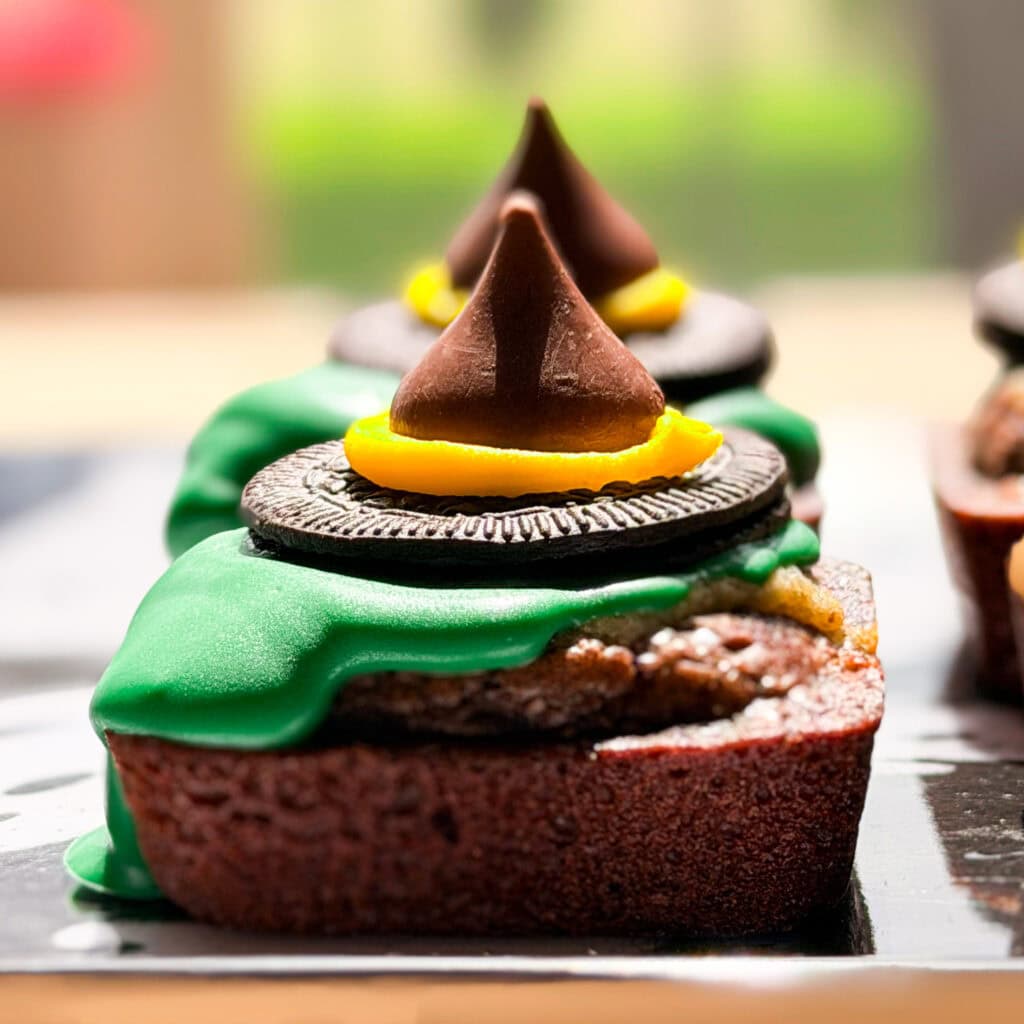
- Bake a batch of your favorite brownies and let them cool. I used this brownie pan for individual brownies.
- Melt green candy melts according to the package directions.
- Spoon the melted candy melts over the top of each brownie, letting it drip over the edges to create the melting witch!
- For the witch hat, place an Oreo Thin on top of the brownie.
- Add a small dab of icing to the center of the Oreo Thin.
- Place a Hershey’s Kiss on top to create the witch’s hat!
- Let the green candy melts set completely, then enjoy!
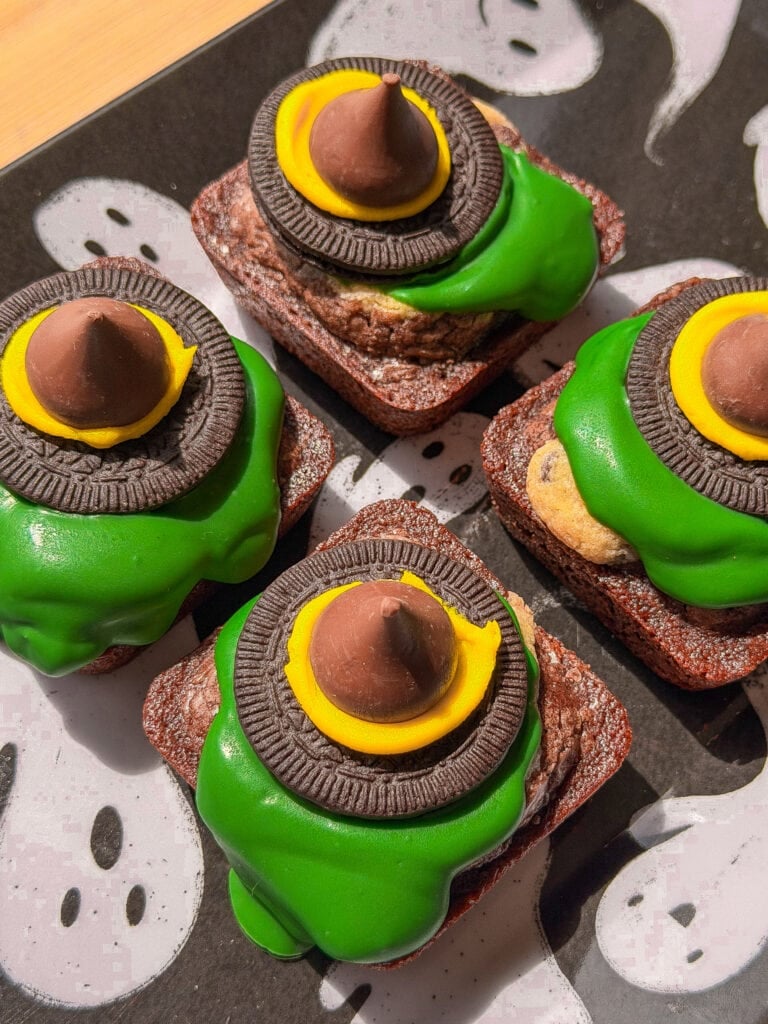
These are SO fun for a Halloween party, school treat, spooky dessert table, or just a fun Halloween treat for the family. 🧡
Video how to make them
9. Spiderweb Cookies
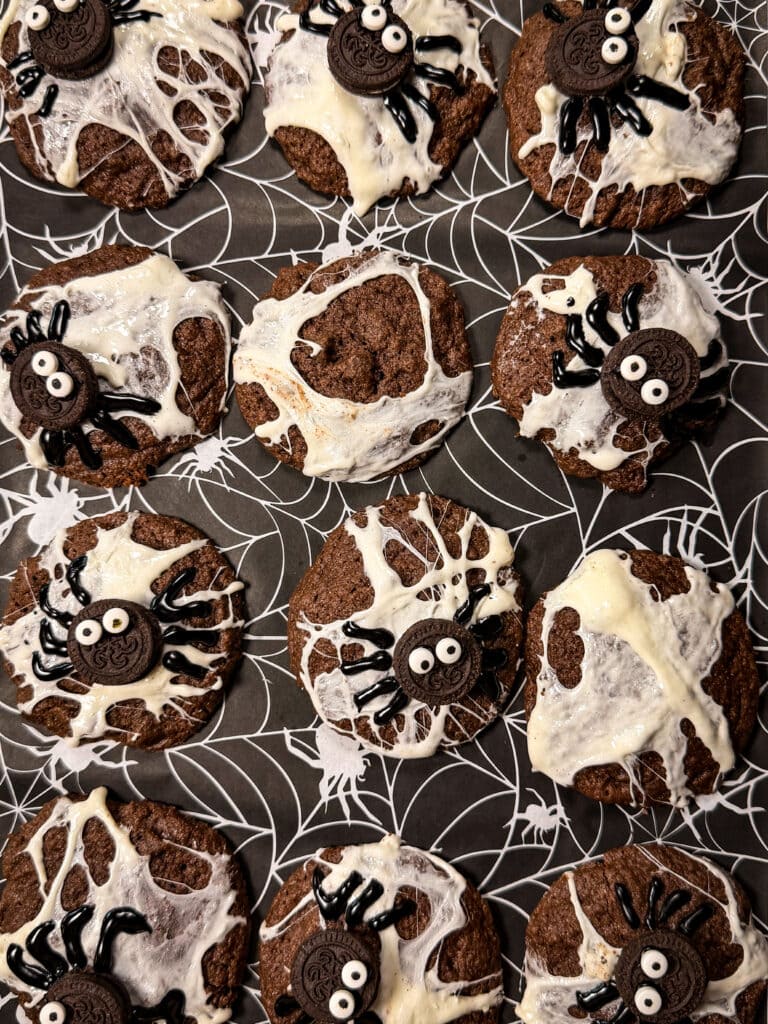
Want to make your favorite cookies extra spooky for Halloween?! These spiderweb cookies are SO fun—and the “web” is made with melted marshmallows!
- Bake your favorite cookies and let them cool completely.
- Place marshmallows in a microwave-safe bowl and microwave for 30 seconds. Stir carefully.
- Once the marshmallows are soft and stretchy, use your fingers to gently stretch the melted marshmallow over the cookies to create a spiderweb effect.
- Place a mini Oreo on top to make the spider.
- Use icing to pipe on 8 little legs.
- Add candy eyes to finish your spooky little spiders!
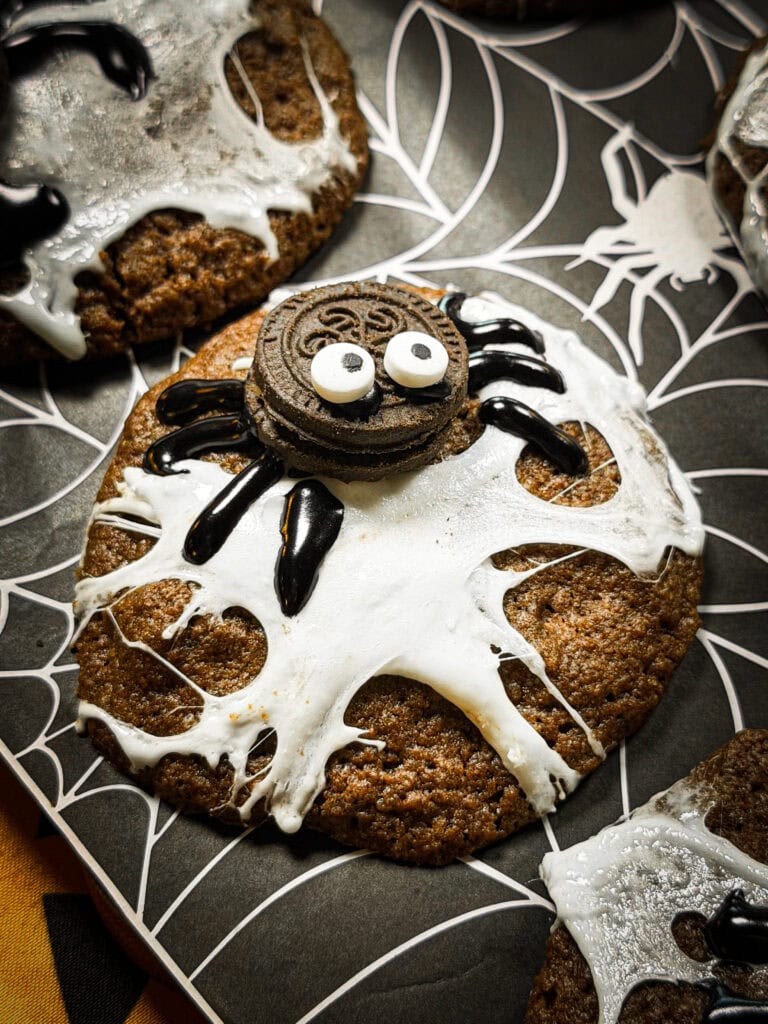
Video how to make these cookies
10. Thumb Print Painted Pumpkins
Not a Halloween food idea-per se, but we love making thumb print pumpkins every year!
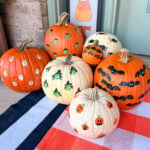
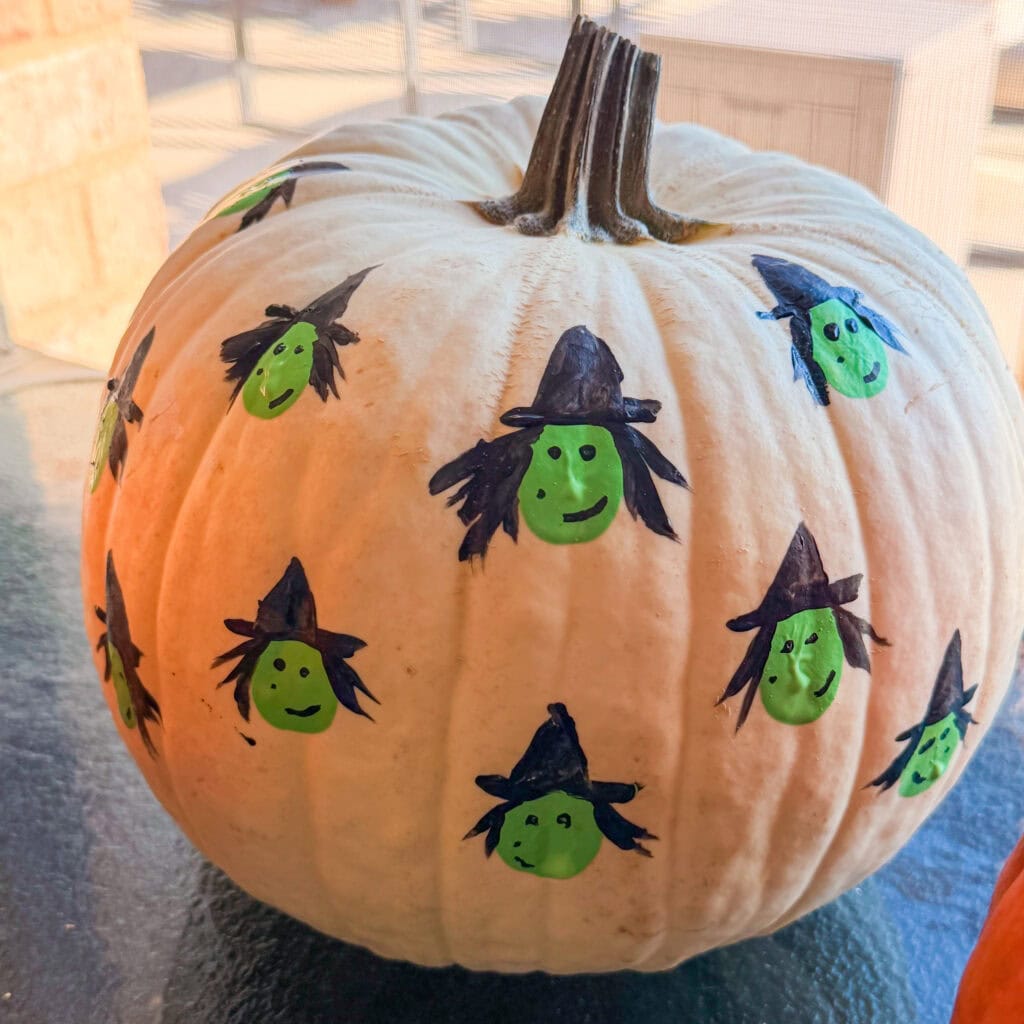
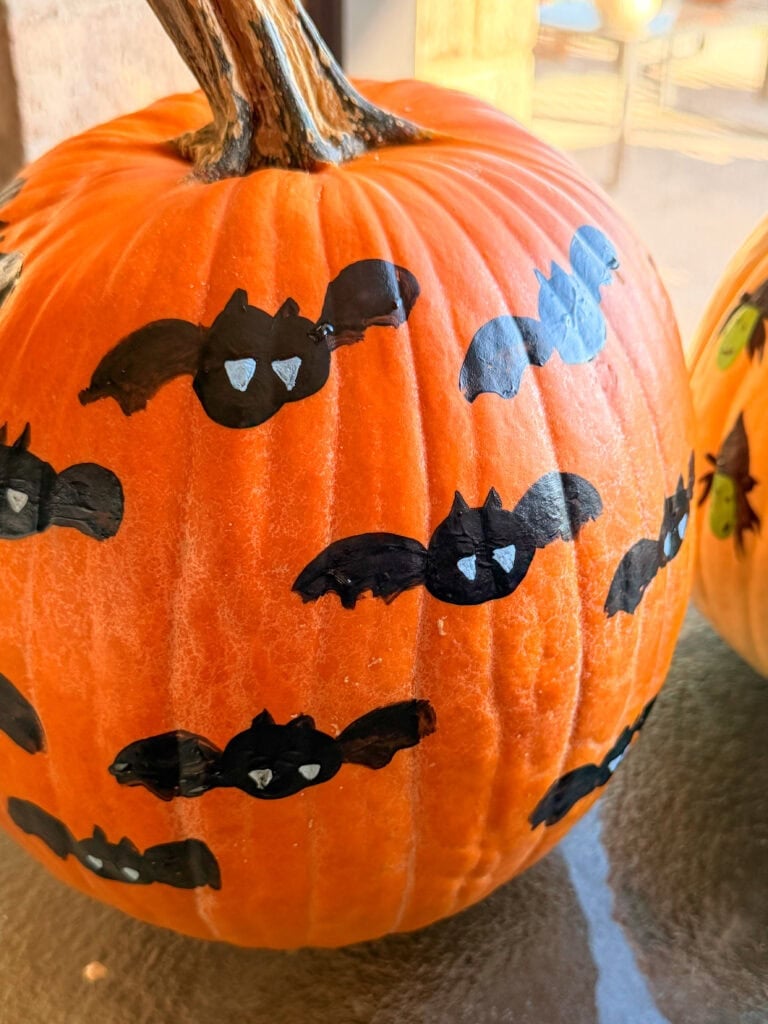
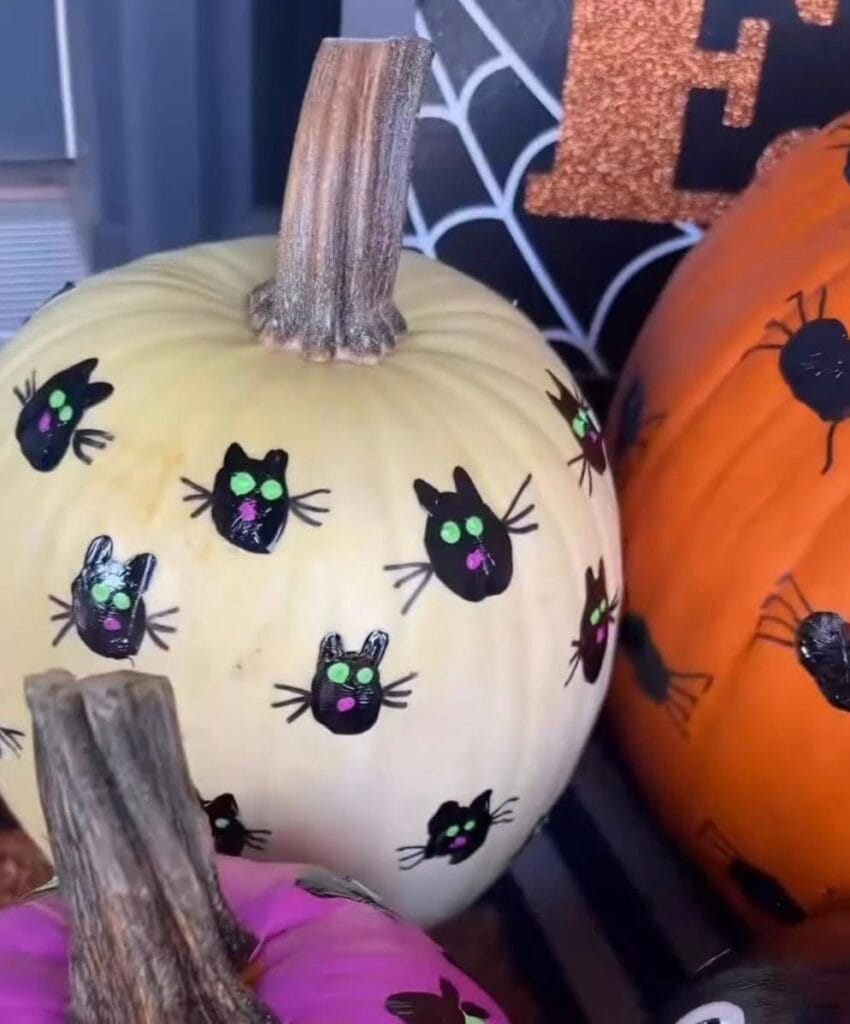
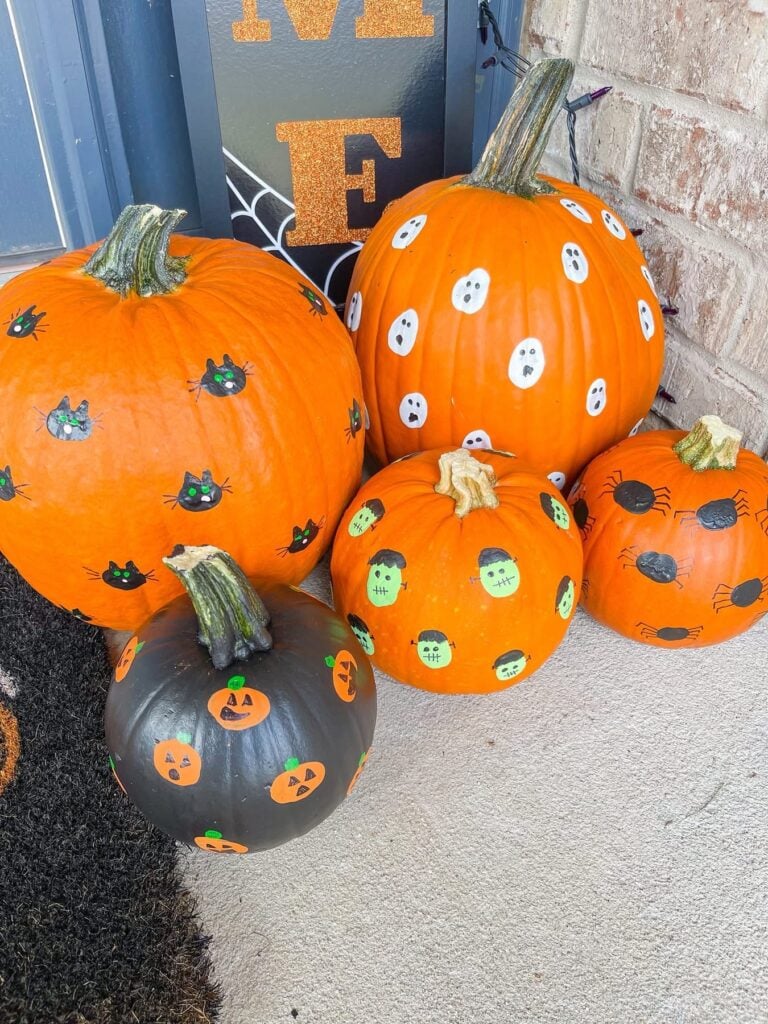
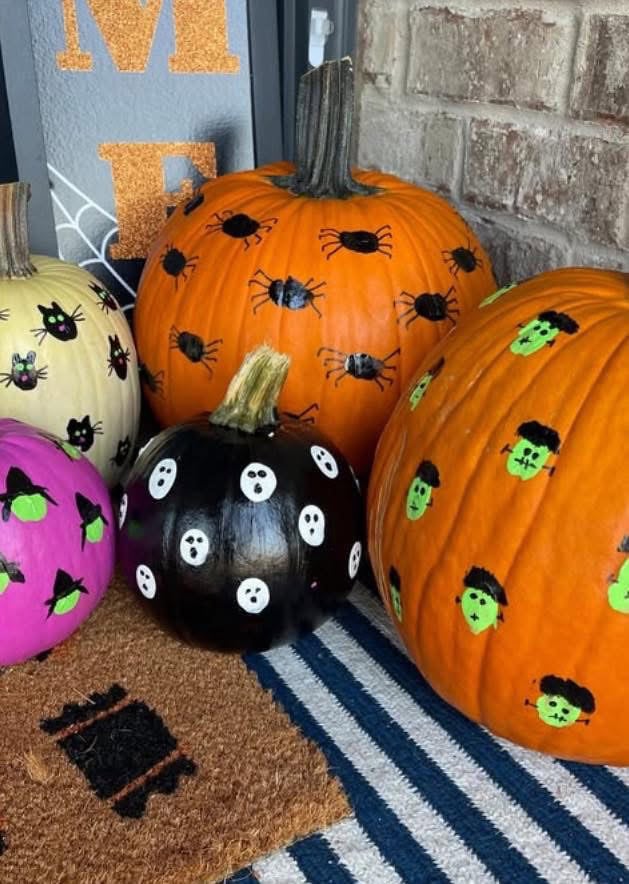
These thumbprint pumpkins are such a fun, easy Halloween craft for kids! All you need is a pumpkin, a few bottles of acrylic craft paint, and your thumbprint to create witches, bats, black cats, spiders, Frankenstein, ghosts, and jack-o’-lanterns. I only used four paint colors to make all seven designs, so you don’t need a ton of supplies!
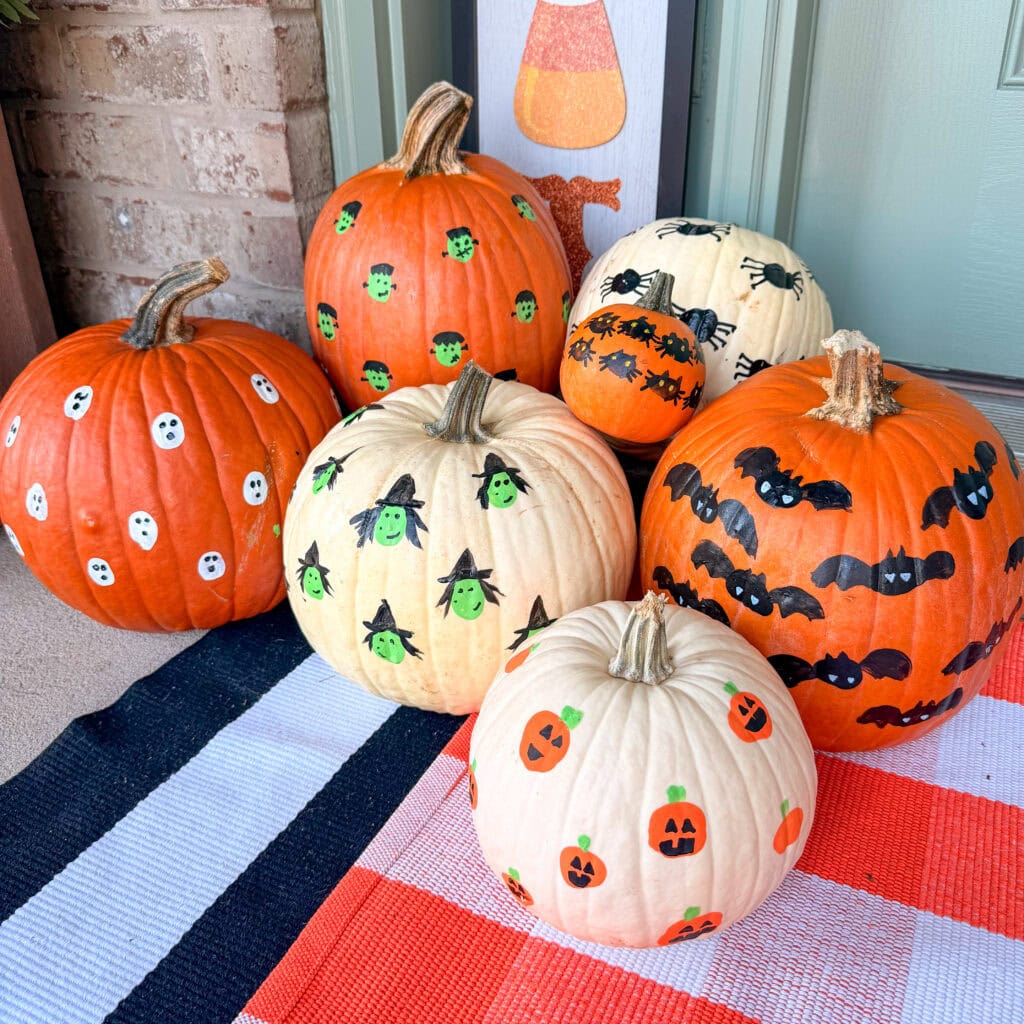
Supplies You’ll Need
- Pumpkins (real or craft pumpkins)
- Acrylic craft paint in white, black, green, and orange
- Paintbrushes
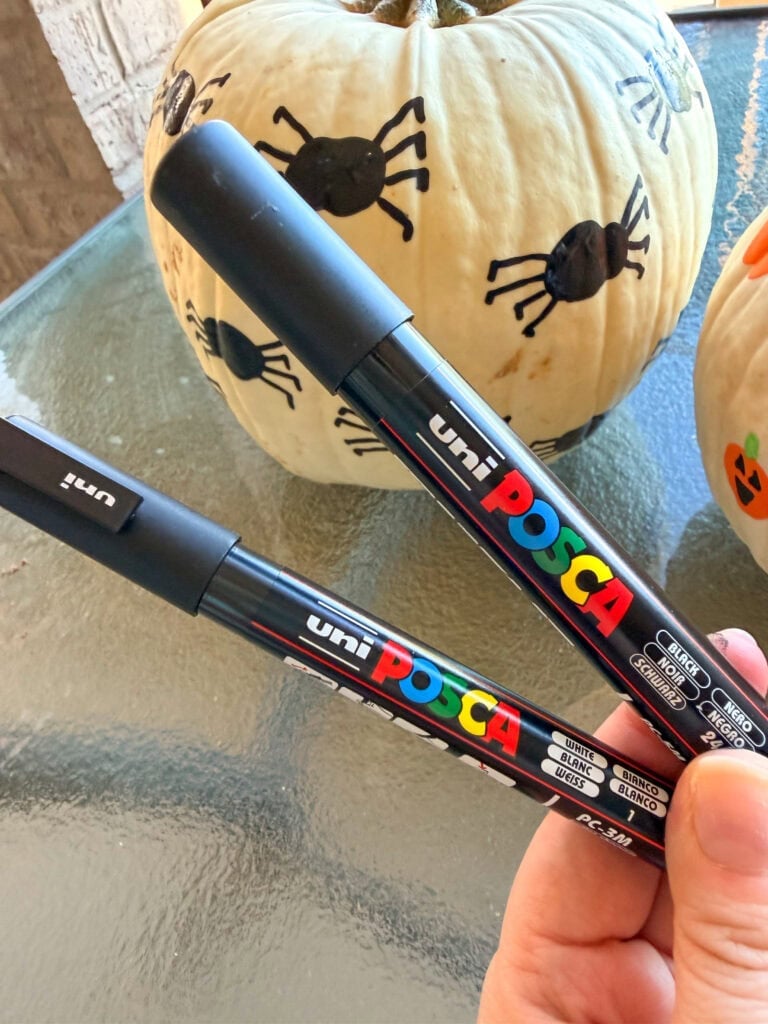
- Black Sharpie marker or Posca paint pens
- Paper plate or paint palette
- Paper towels and water for cleanup
1. Wash and dry your pumpkin.
Before you start painting, wash your pumpkin to remove dirt and dust. Dry it completely with a towel and let it air-dry if needed. This step is important because paint sticks much better to a clean, dry surface!
2. Set up your paint colors.
Squeeze a little of each acrylic paint color onto a paper plate or paint palette. Acrylic craft paint works best for this project because it provides good coverage and dries nicely on the pumpkin.
I used just four colors: white, black, green, and orange. You can create lots of different Halloween characters with these basic colors!
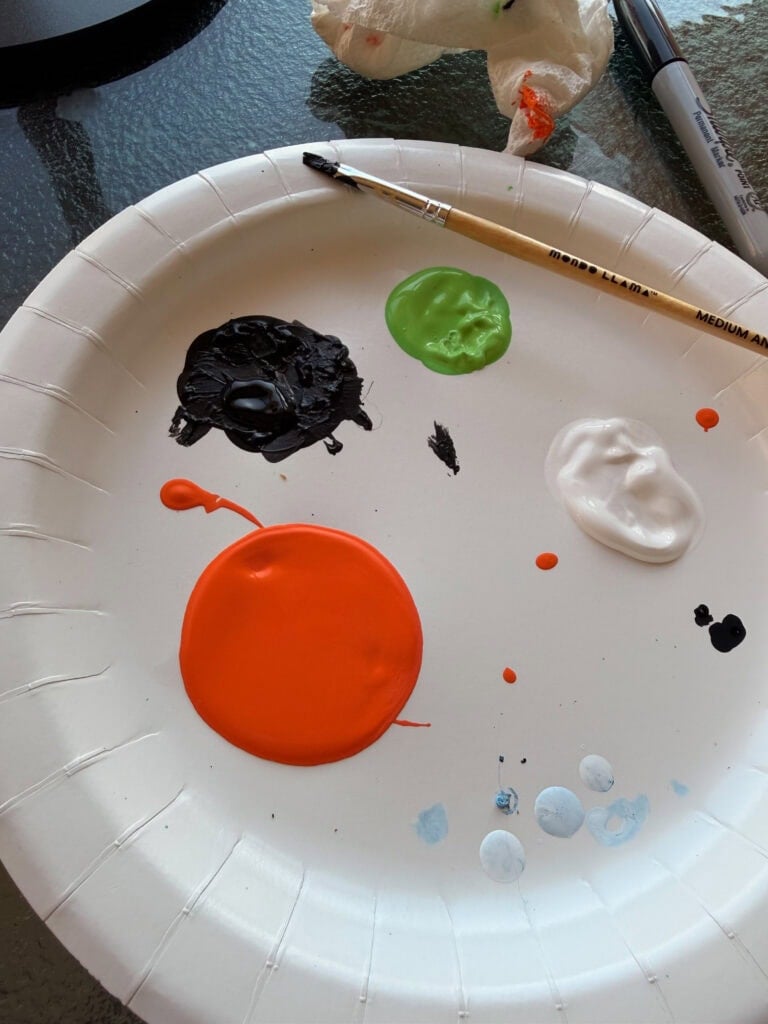
3. Make your thumbprints.
Dip your thumb lightly into the paint and press it onto the pumpkin. Try not to use too much paint, or your fingerprints may look smudged. Press firmly enough to leave a clear print, then lift your thumb straight up.
Make several prints in different colors around the pumpkin, leaving a little space between them. Let the paint dry before adding the details.
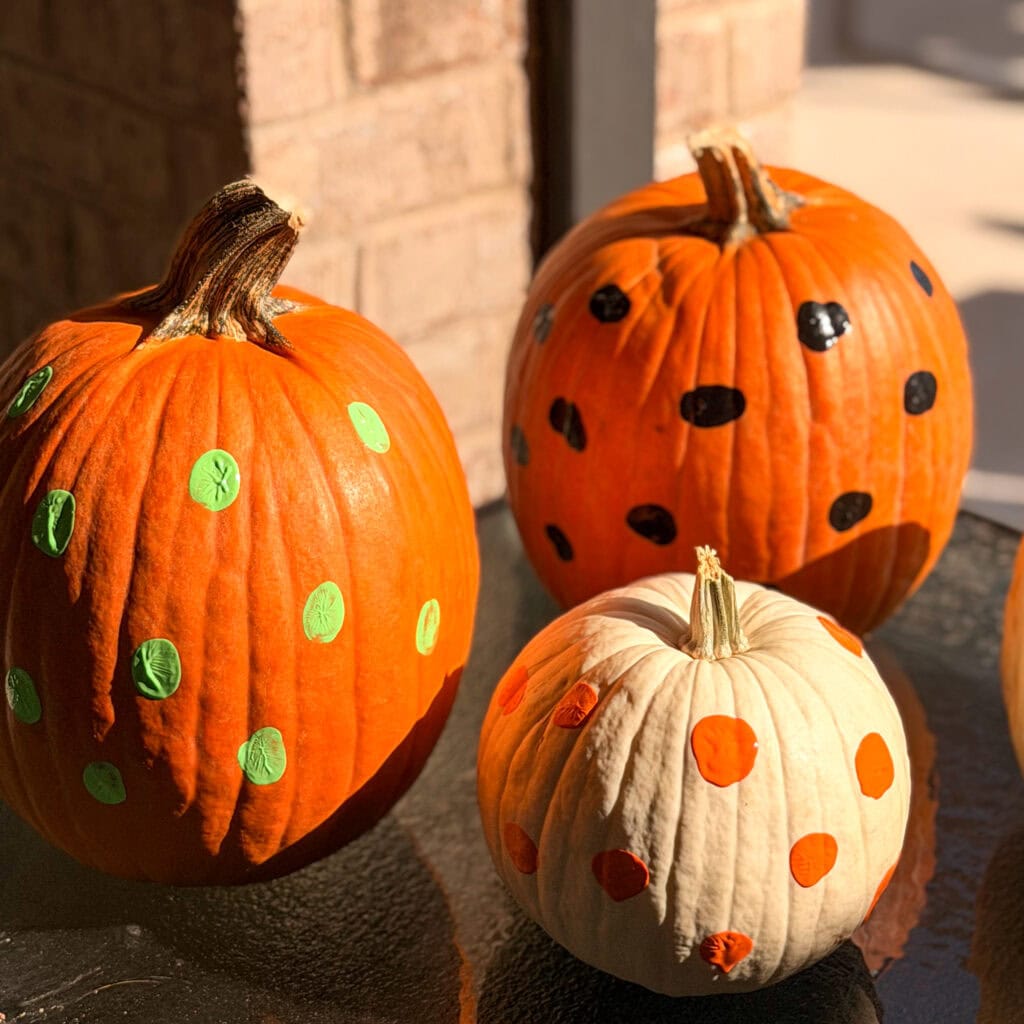
4. Turn your thumbprints into Halloween characters.
Once the prints are dry, it’s time to get creative! Use a black Sharpie or Posca paint pens to draw faces, legs, wings, hats, and other details.
Here are some fun ideas:
- Witches: Use a green thumbprint for the face, then draw or paint on a black pointed hat, eyes, nose, and a smile. I added a little mole.
- Bats: Make black thumbprints sideways and add little wings, ears, and teeth with a paint pen.
- Black cats: Use black thumbprints for the body or head. Draw on pointed ears, whiskers, eyes, and a tail.
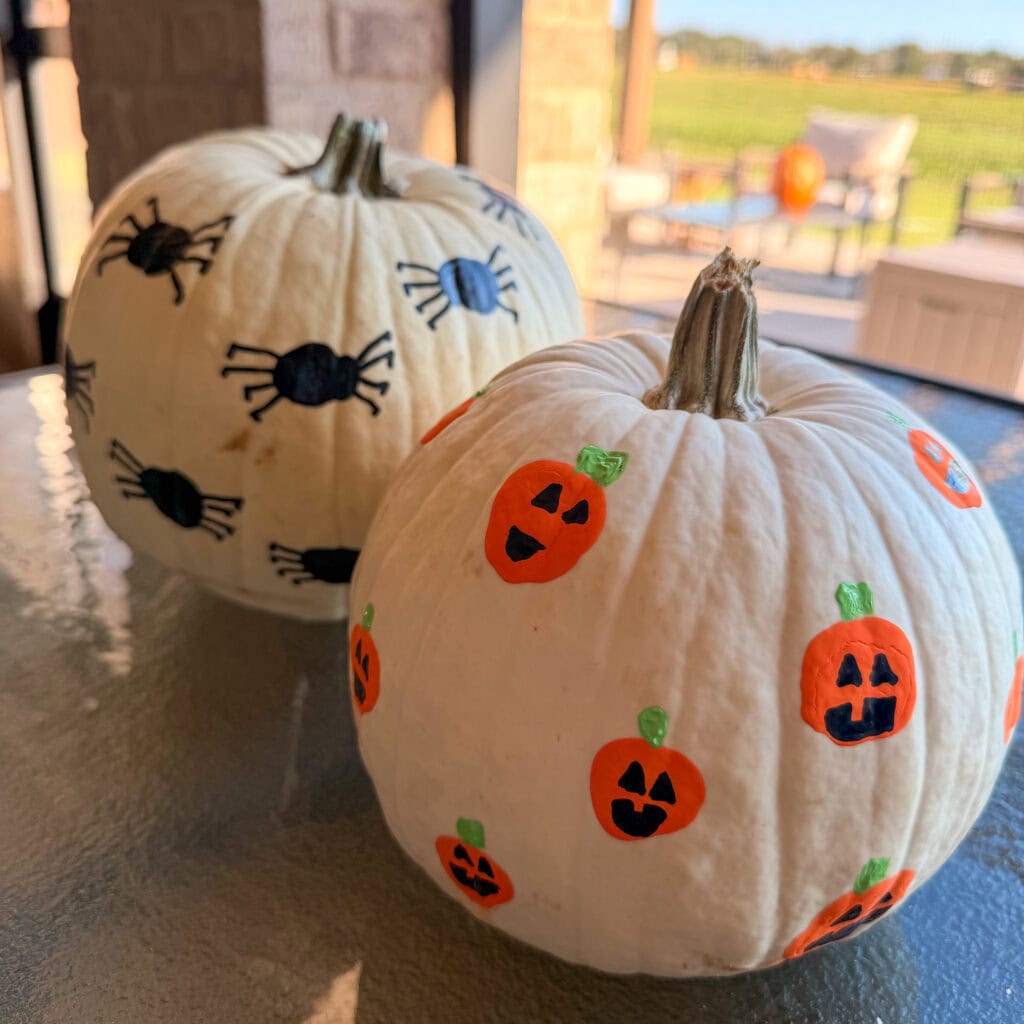
- Spiders: Use black thumbprints sideways for the bodies, then draw several thin legs extending from each side.
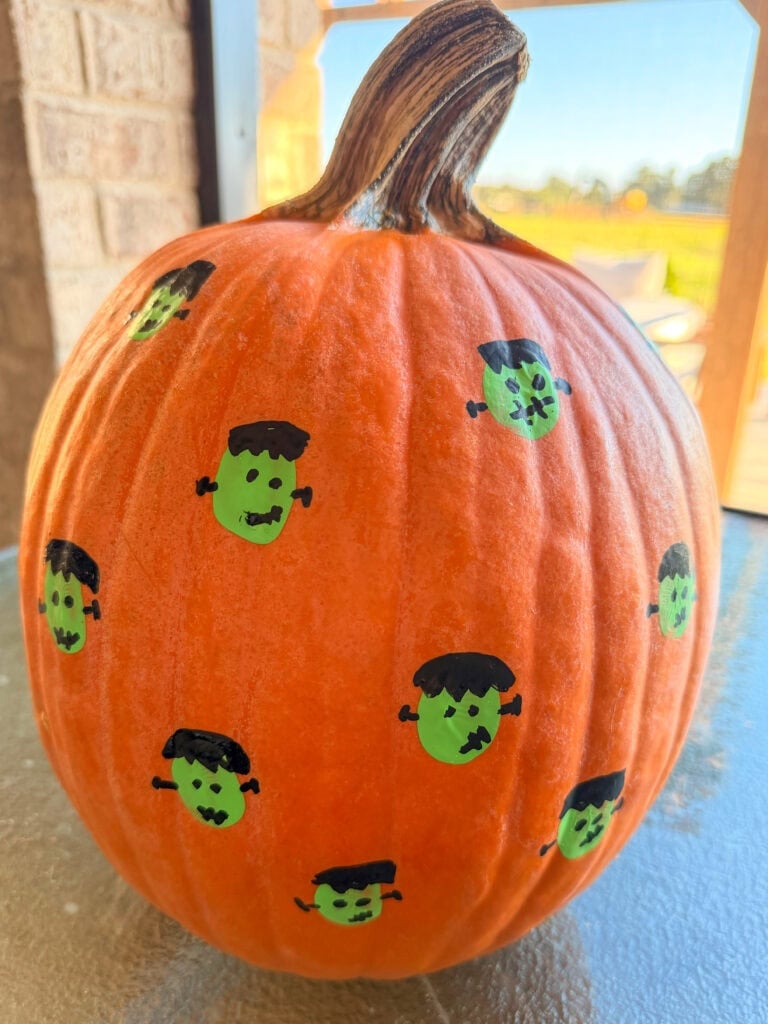
- Frankenstein: Make green thumbprints for the face, then add black hair, eyes, a mouth, the bolts on the side of the neck and little stitch marks.
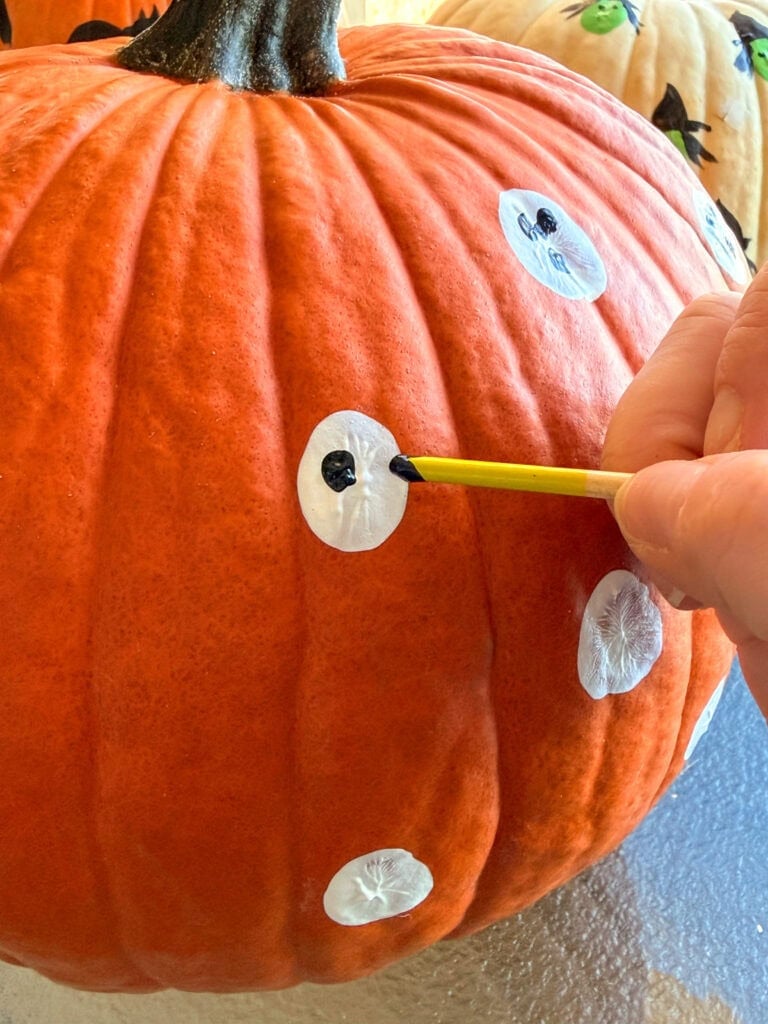
- Ghosts: Use white thumbprints to create ghost shapes. Add black eyes and a little mouth using the back of a paintbrush.
- Jack-o’-lanterns: Use orange thumbprints and draw on black triangle eyes, a nose, and a zigzag smile.
5. Make easy eyes with a paintbrush.
Want a simple way to add eyes without drawing tiny circles? Dip the back end of a paintbrush into black or white paint and gently dot it onto your thumbprints. This creates neat, round eyes in seconds! Let the dots dry before adding any other details.
6. Add the finishing touches.
Use your black Sharpie or Posca paint pens to add the small details that bring each character to life. I especially love using Posca paint pens because they’re great for drawing little lines, expressions, and decorations.
Allow all the paint to dry completely before displaying your pumpkin.
7. Display your Halloween pumpkin!
That’s it! You now have an adorable Halloween pumpkin covered in tiny thumbprint characters. This is such a fun activity for a Halloween party, a classroom craft, or an afternoon of crafting with the kids. Every pumpkin turns out a little different, and that’s part of the fun!
Tips for the Best Results
- Use acrylic craft paint. It works best for creating colorful, defined thumbprints.
- Start with a clean, dry pumpkin. Dirt and moisture can keep the paint from sticking properly.
- Don’t overload your thumb with paint. A thin layer gives you a clearer fingerprint.
- Let each layer dry. This helps keep your colors and details from smearing.
- Use the back of a paintbrush for dots. It’s an easy way to make round eyes.
- Try Posca paint pens. They’re one of my favorite ways to add faces and tiny details.
- Make it your own! You can mix and match characters, add extra colors, or let the kids invent their own Halloween creatures.
Video Thumb Print Painted Pumpkins
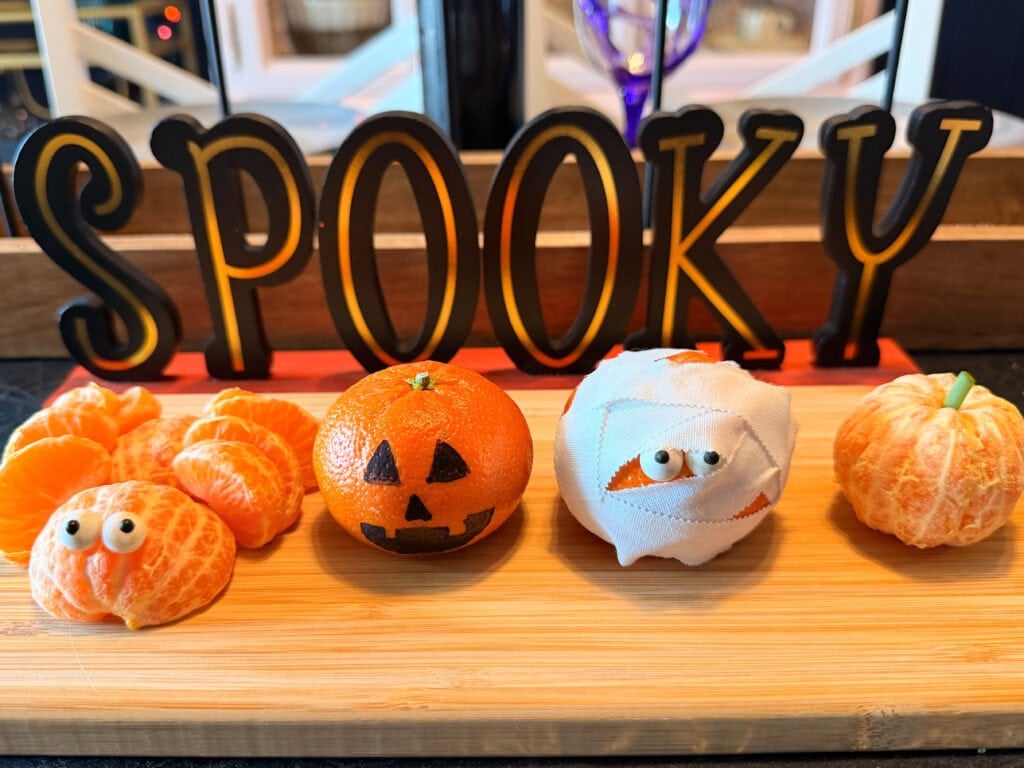
11. Cuties Mandarin Oranges Halloween Snacks
Turn simple mandarin oranges into the cutest little Halloween snacks! These are SO easy, and the kids will love them.
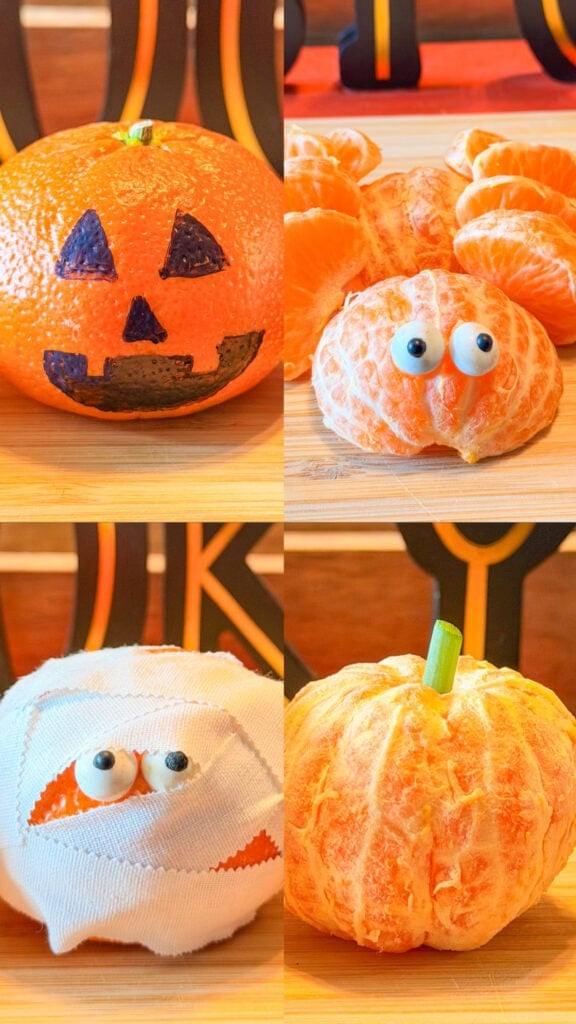
🎃 Jack-o’-Lantern: Grab a marker and draw a cute Jack-o’-lantern face right on the peel!
🕷️ Spider: Use 2 peeled mandarin orange halves for the body and arrange 8 orange segments around them for the legs. Add candy eyes if you want! 👀
👻 Mummy: Wrap a peeled or unpeeled mandarin orange with a little gauze or clean bandage material to make an easy mummy!
🎃 Pumpkin: Add a tiny piece of celery or another green veggie to the top for the stem.
Such a fun way to make a healthy Halloween snack feel extra special!