Foolproof Juicy Thanksgiving Turkey
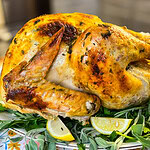
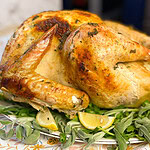
If you’ve ever felt stressed about making the perfect Thanksgiving turkey — this post is for you! I’ll show you how to make a virtually hands-off, stunning turkey with no basting required! Just pop your turkey into the oven, assemble all the side dishes, and get wait for the ooh’s and ahh’s. This recipe takes out all the guesswork of roasting the perfect bird for Thanksgiving dinner.

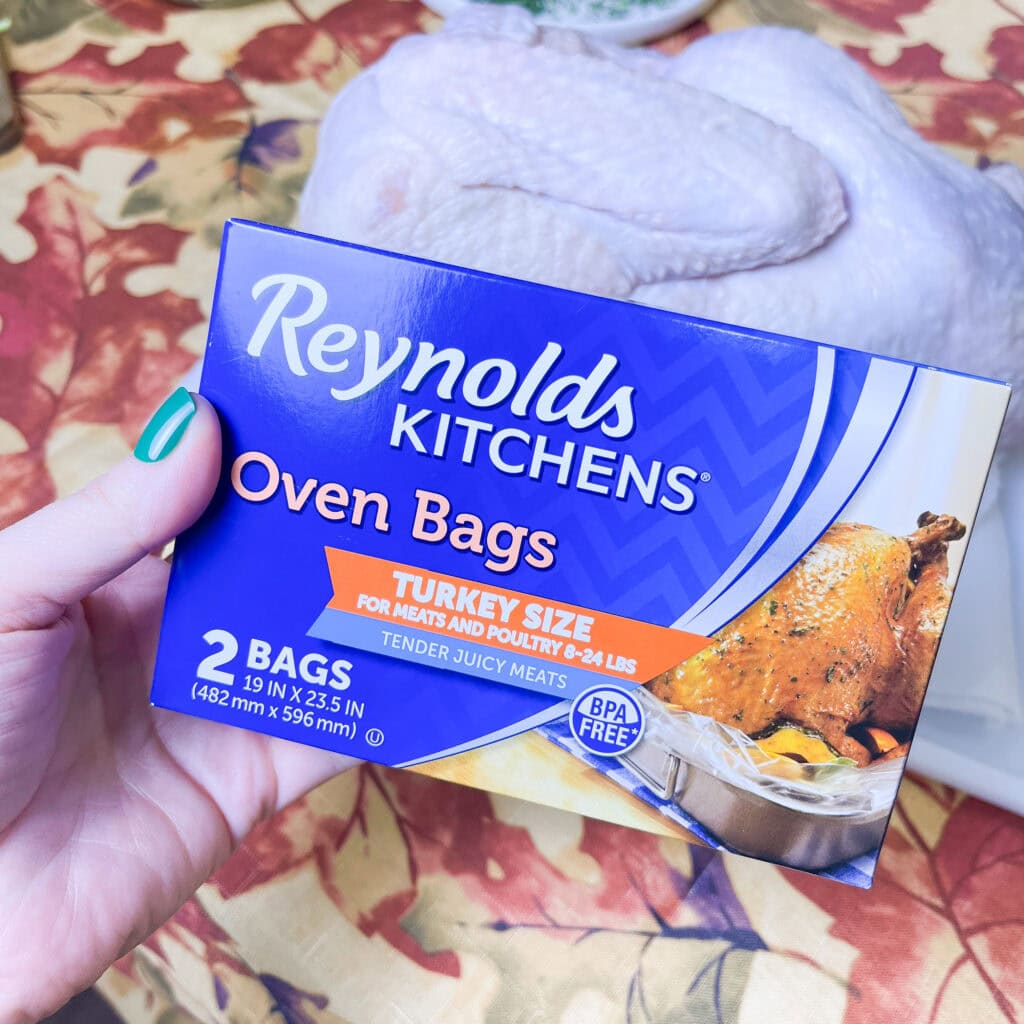
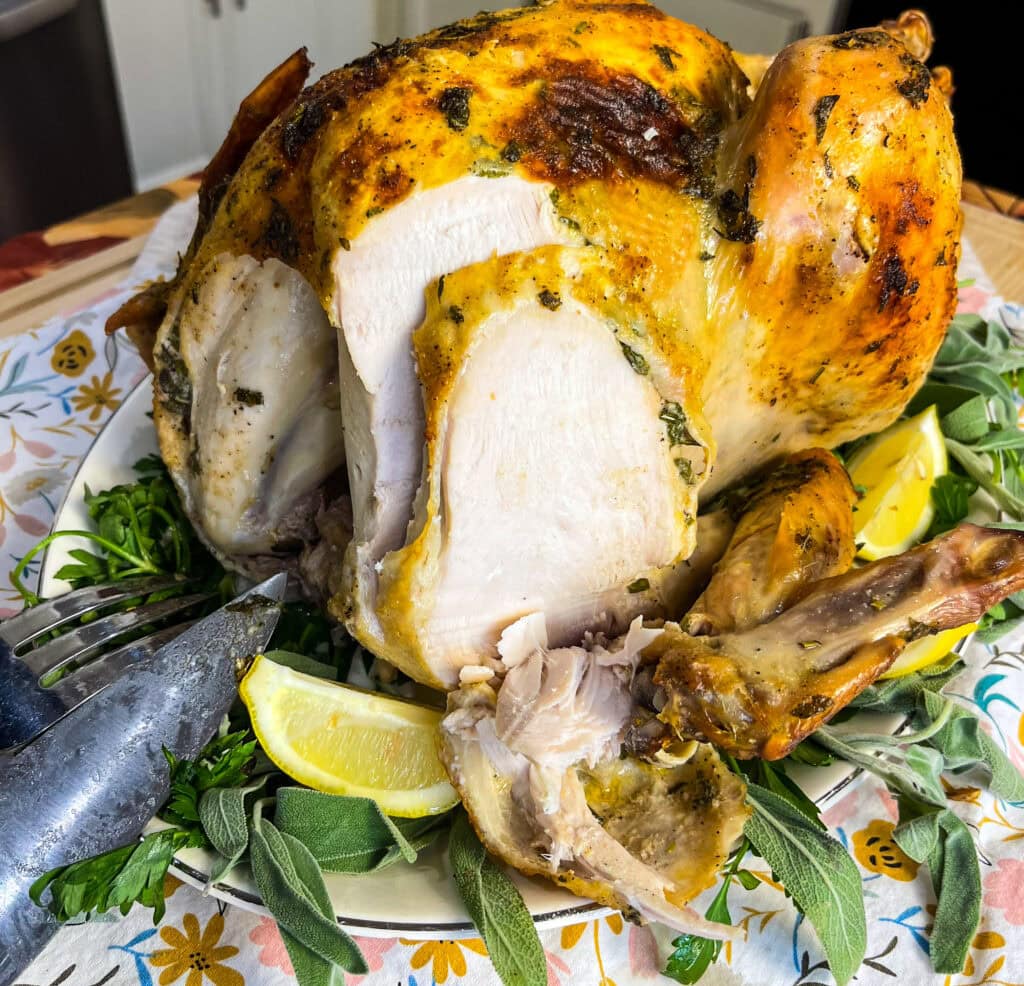
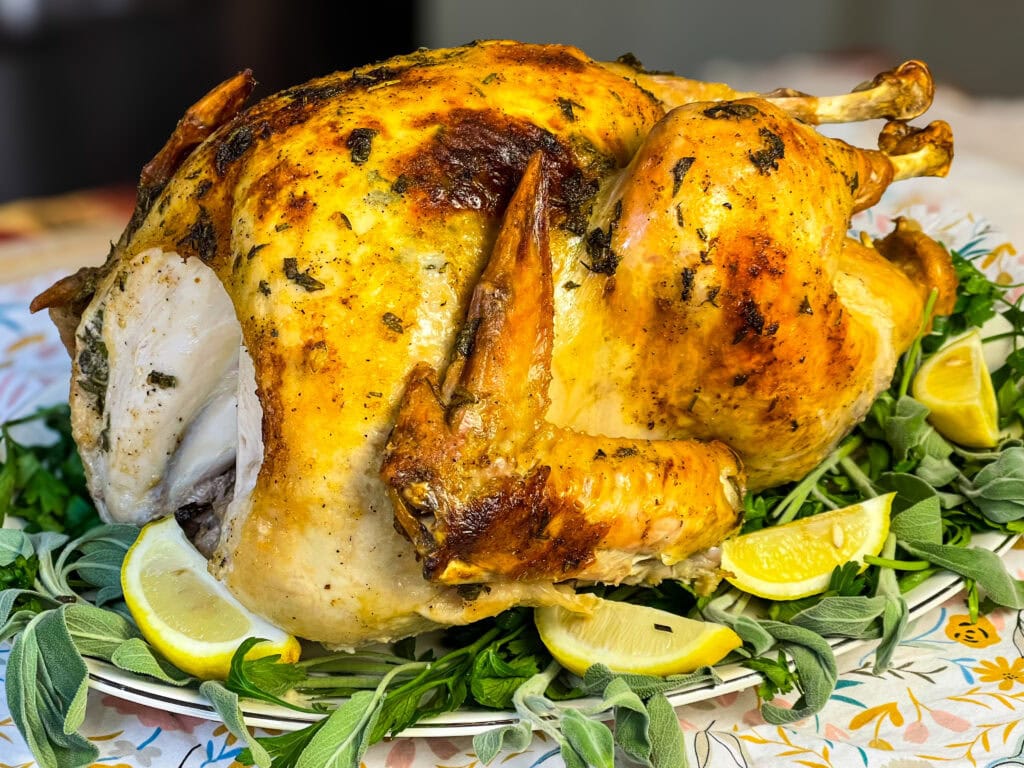
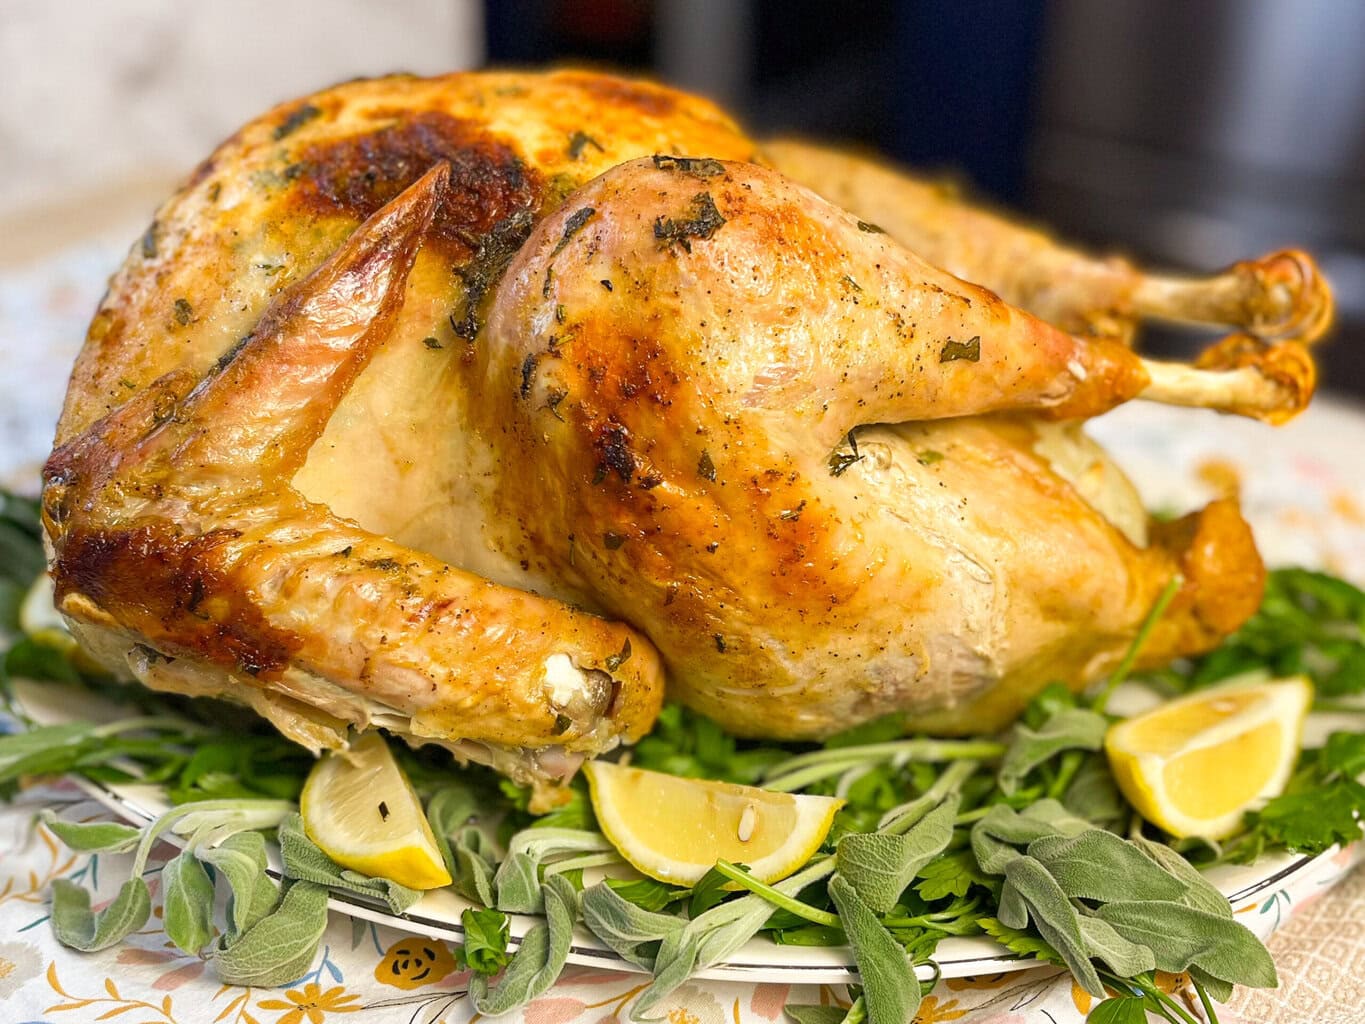
That’s right! I said no basting! The secret to a juicy roasted turkey with no basting is cooking the turkey in a Reynolds turkey roasting bag. The bag locks in the moisture and juices. The hardest part is waiting to dig in!
To prepare this juicy, flavorful turkey we’re using a simple herby compound butter and stuffing the bird with aromatics like a fresh herb bouquet, lemons and onions, for extra flavor from within. After the turkey is finished we’re making silky-smooth gravy right from the drippings.
I spent years so intimidated to make a whole turkey for Thanksgiving that I usually just bought it pre-made or cooked turkey breasts- until I discovered this easy method. I’m telling you- it’s fool-proof! So, if you’ve never roasted a whole turkey before and you’re ready to make this your year, or if you’ve had sub-par results in the past, try this recipe! I know you’ll love it and so will your guests!
Why You Need a Wireless Meat Thermometer
Another fool-proof way to cook the perfect turkey is using a wireless meat thermometer.
A wireless meat thermometer takes all the stress out of roasting. You can track your turkey’s internal temperature right from your phone, so you’ll know exactly when it’s done — without opening the oven or the bag. I personally use and LOVE the Cosori wireless smart meat thermometer.
✅ No more overcooked turkey.
✅ No more constant checking.
✅ Perfectly juicy meat every time.
I was gifted one about a year ago from the company to try and it met and unfortunate fate in the garbage disposal. 🙃 I loved it so much I purchased another one. It’s worth the investment and you’ll never over cook meat again. It works in the oven, crock pot, even air fryer.
No more guessing. No more dry turkey. Just juicy, buttery perfection.
Why You’ll Love This Method
- Juicy, golden skin every time — no basting or flipping.
- Flavorful butter rub keeps the meat tender and seasoned through and through.
- Easy cleanup thanks to the roasting bag!
- Two gravy options: a quick pan-dripping gravy or a make-ahead version to simplify your holiday prep.

🍽️How Much Turkey Do I Need?
Here’s a quick guide to how many people each turkey size will feed — and whether you’ll have leftovers for those dreamy next-day sandwiches.
| Turkey Weight | Serves (No Leftovers) | Serves (With Leftovers) |
|---|---|---|
| 10 pounds | 8–10 people | 6–8 people |
| 12 pounds | 10–12 people | 8–10 people |
| 14 pounds | 12–14 people | 10–12 people |
| 16 pounds | 14–16 people | 12–14 people |
| 18 pounds | 16–18 people | 14–16 people |
| 20 pounds | 18–20 people | 16–18 people |
🦃 Steph’s Real Life Tip: If you’re feeding a crowd that really loves turkey (or just want guaranteed leftovers), plan for 1½ pounds per person.
For lighter eaters or lots of hearty sides, 1¼ pounds per person will do the trick.
What You’ll Need
Find the full, printable recipe with exact measurements at the bottom of this post. Read on for more details and tips!
On the recipe card below, click “print recipe” and from there you can print out the page or screenshot it to save to your phone’s photo album.
Pin this recipe to save to Pinterest so you can make it later! You can Pin It from the recipe card below. Just click the “Pin Recipe” button. If you’d like to follow me on Pinterest , my page is Steph Gigliotti.
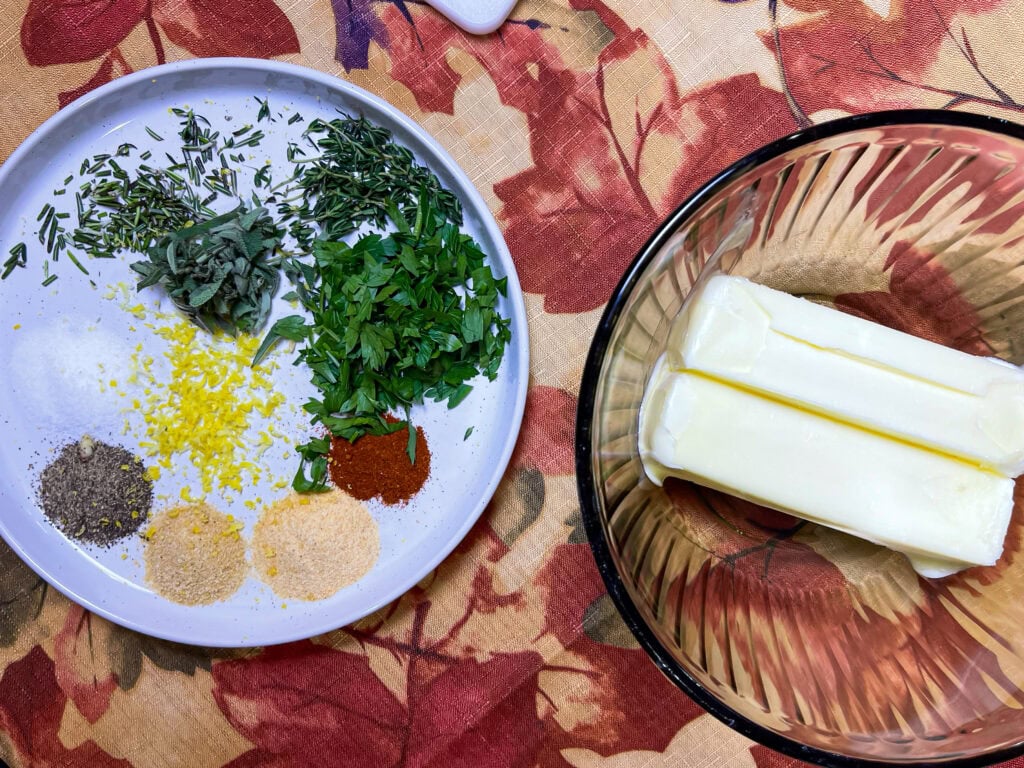
🧈For the Herb & Garlic Compound Butter
Perfect for a 12–15 pound turkey (double for a 20 + pound turkey)
- Unsalted butter
- Dried seasonings- black pepper, kosher salt, garlic powder, onion powder, paprika
- Fresh herbs- rosemary, thyme, parsley, sage

🦃To Stuff in the Turkey
- Onion
- Lemons
- Fresh herbs-parsley, thyme, rosemary and sage
⏲️For Roasting
- 1 Reynolds Turkey Size Oven Bag (Ensure it says turkey on the box)
- Nonstick cooking spray
- 1 tablespoon flour
- Roasting pan and rack
- Wireless meat thermometer
- Kitchen twine
🍗Gravy
- Pan drippings from roasted turkey (strained)
- All-purpose flour- to thicken
- Extra turkey or chicken broth (low sodium)
- Salt and pepper, to taste
- Butter
- Fat separator or heat resistant measuring cup

Step 1: Thaw the Turkey
Before we can cook the turkey it needs to be completely thawed. If your turkey is frozen, plan ahead — this step takes the longest!
Fridge Thawing Time:
- Allow 24 hours of thawing time per 4–5 pounds of turkey in the refrigerator.
- 12 lb turkey → about 3 days
- 15 lb turkey → about 4 days
Quick Tips:
- Keep the turkey in its original packaging and place it on a rimmed tray to catch any drips as it thaws.
- Be aware of cold spots in your fridge. For example, my 12 pound turkey took 7 full days to thaw because I stored it in the back of my fridge where it gets a lot colder than the front.
Step 2: Prepare the Turkey
When fully thawed, remove the turkey from the fridge. Allow it to come to room temperature for 30 minutes. Open its packaging over the sink.
- Take out the neck and giblet bag from the main cavity (and sometimes from the neck area).
- You can discard these, save them for stock, or use them for giblet gravy.
Then, give the turkey a quick rinse inside and out with cold water (optional but many cooks prefer it), and pat completely dry with paper towels.
🧽 Dry = Crispy Skin!
Any leftover moisture on the skin will steam the turkey instead of roasting it, so make sure it’s thoroughly dry. Plus the butter will stick to dry skin easier.
Step 3: Loosen the Skin
To help that delicious butter get under the skin (where all the magic happens):
- Gently slide your fingers under the skin over the breasts, starting at the edge of the cavity.
- Work slowly so you don’t tear the skin.
- Loosen as much as you can over the breast meat and top of the thighs.
This creates little “pockets” for your butter to go under the skin and flavor the meat as it cooks.

Step 4: Stuff the Cavity
It’s best not to stuff the turkey with stuffing using this cooking method. Stuffing changes the cooking time and may cook unevenly. I recommend baking the stuffing separately.
We will, however, stuff it with aromatics to season the turkey from within.
To the cavity add 1-2 lemons cut in half (be sure to zest them first to use in the compound butter), 1 medium onion, halved or quartered and a bouquet of fresh herbs-parsley, thyme, sage and rosemary. Tie the herbs together using kitchen twine to make them easy to remove.
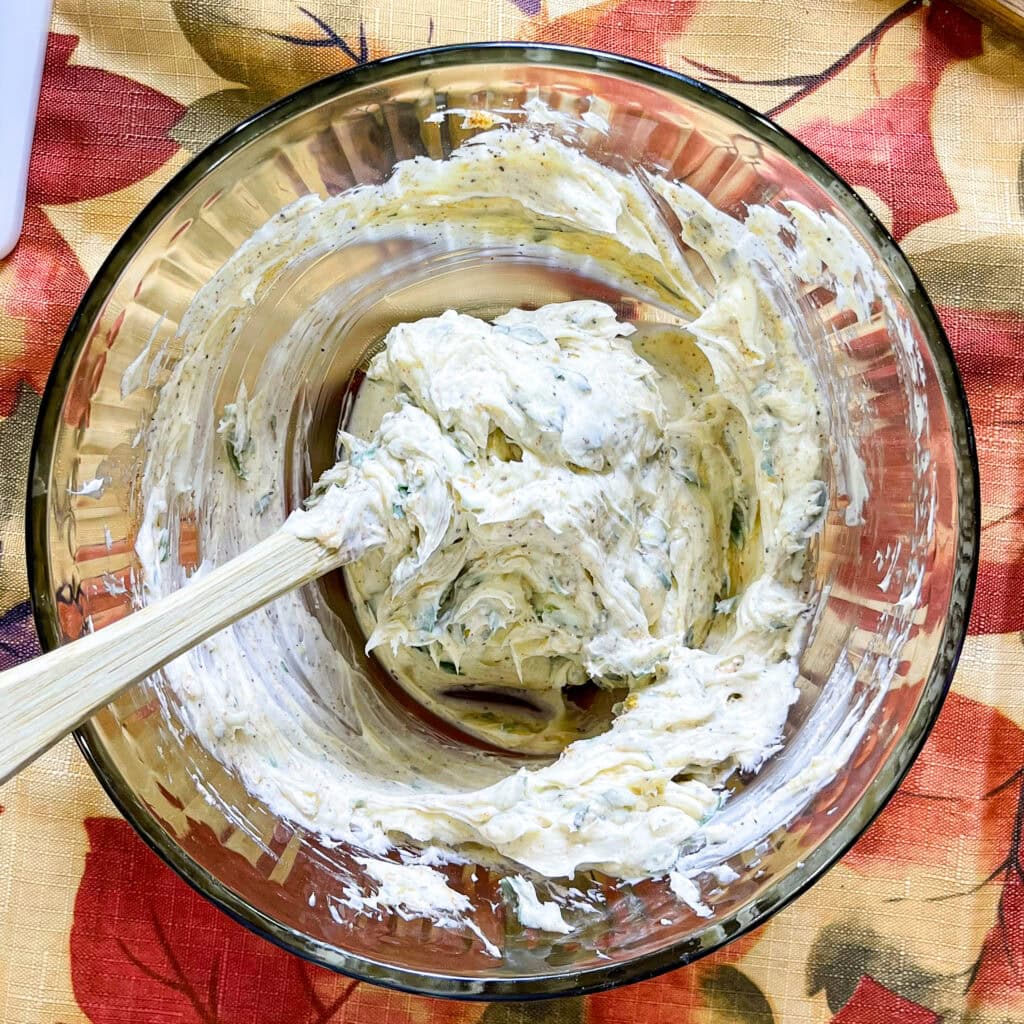
Step 5: Prepare the Compound Butter
*The steps to butter the turkey and stuff the cavity are interchangeable.
- In a medium bowl, combine the softened butter and all seasonings and mix together until smooth and evenly mixed.
- Be sure to pat the turkey completely dry with paper towels first.
- Rub half the butter under the turkey skin (especially over the breasts).
- Rub the remaining butter over the outside of the turkey.
- Tuck the wings under and tie the legs if needed.

➡️How to Tie Turkey Legs (a.k.a. Trussing Made Easy)
Trussing might sound fancy, but it’s really just tying the legs together so your turkey cooks evenly and looks beautiful when it comes out of the oven.
When the legs are snug, it helps the bird hold its shape, keeps the aromatics from spilling out, and prevents the tips of the drumsticks from drying out.
- Cut a length of kitchen twine about 18–24 inches long — enough to wrap around both legs and tie a secure knot.
- Cross and Tie: Bring the two drumsticks together so they cross at the tips.
- Loop the twine once around both legs, pull them snug toward the body, and tie a firm knot.
- Wrap the twine once more for security, then tie a double knot or bow to hold it in place.
- Tuck the Wings (Optional but Recommended): Fold the wing tips under the turkey’s body — this prevents them from burning and helps the turkey cook more evenly.
💡 Steph’s Real Life Tip:
If your turkey comes with a built-in plastic leg holder or metal clamp, you can skip the twine and use that instead — just make sure it’s oven-safe (most are!).
The goal is simply to keep the legs close to the body so your turkey looks picture-perfect when it comes out of that Reynolds bag.
Your turkey is now fully prepped and ready for the Reynolds Oven Bag and roasting!
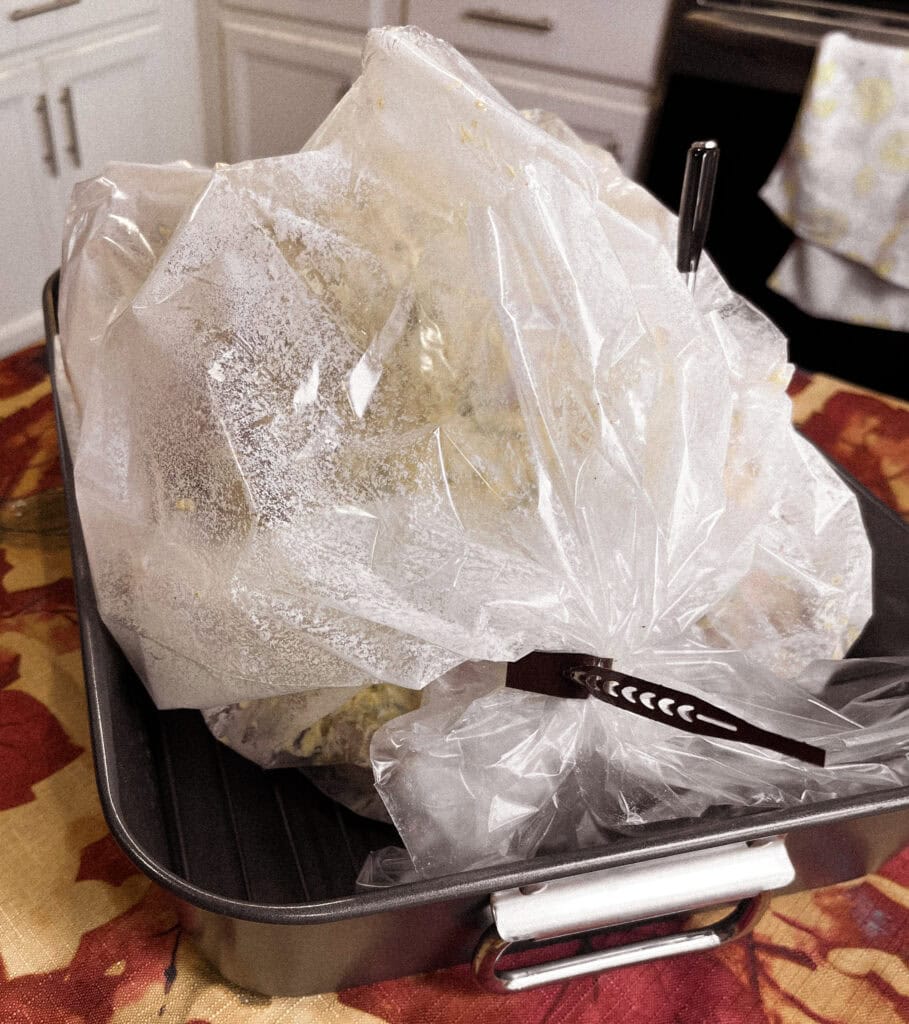
Step 6: Bag the Turkey
- Preheat oven to 350°F.
- Open the oven bag. Lightly spray the inside of 1 of the oven bags with nonstick cooking spray- this helps the flour stick.
- Shake 1 tablespoon flour inside the oven bag. This helps the turkey to not stick to the bag.
- Place bag in roasting pan and add the turkey breast-side up.
- Seal the bag with the included tie and cut 6 small ½-inch slits on top to vent steam.
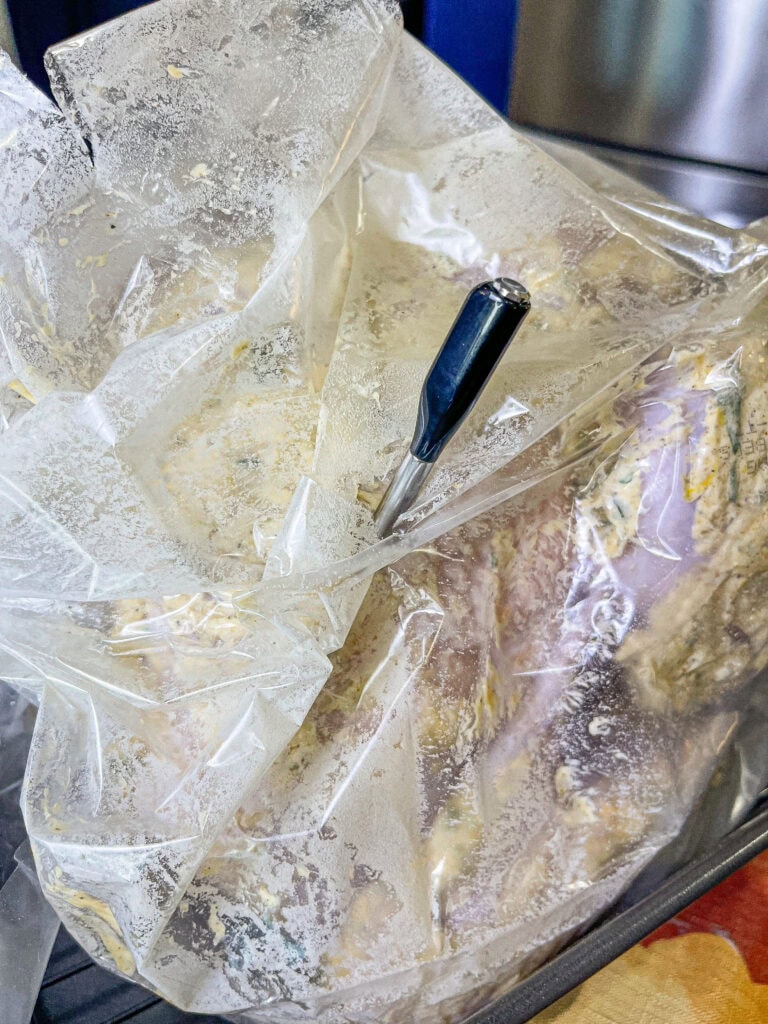
- Cut a small slit in the bag near the breast. Insert your wireless meat thermometer into the thickest part of the breast or thigh (not touching bone).
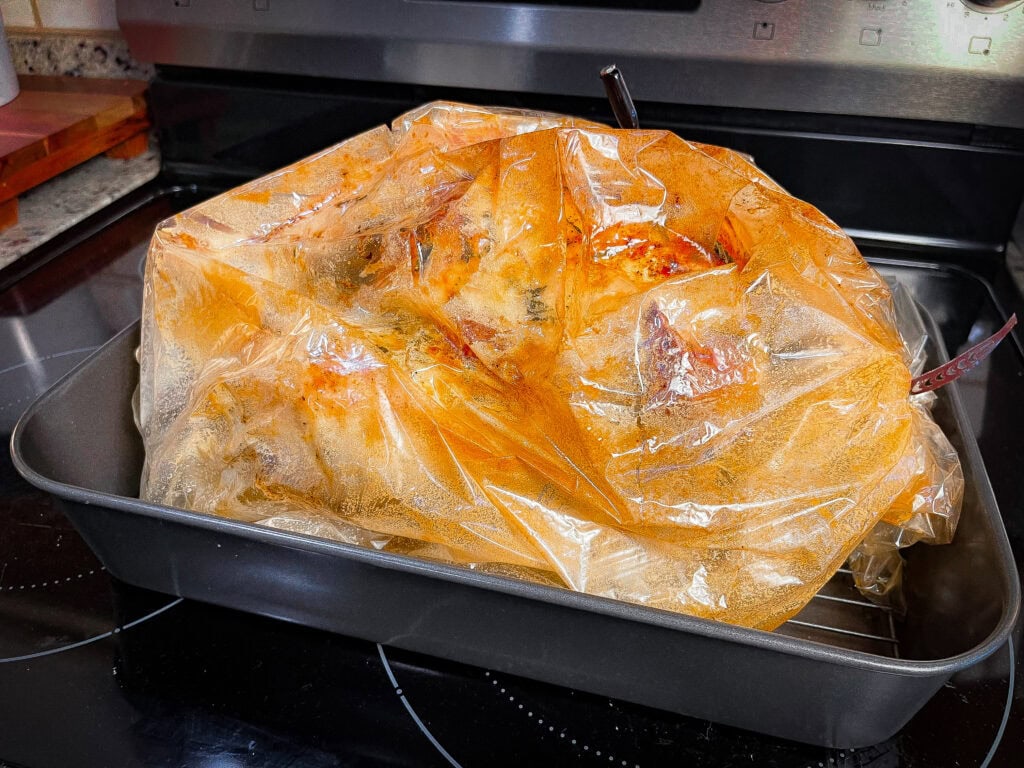
- Roast according to the time chart below or until the thermometer reads 165°F. (Approximately 2- 1/2 hours). Meanwhile you can prepare your side dishes- no basting is required!
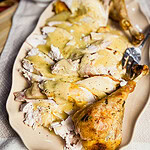
- Let the turkey rest in the bag for 20–30 minutes before carving.
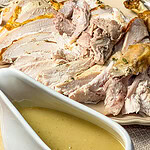
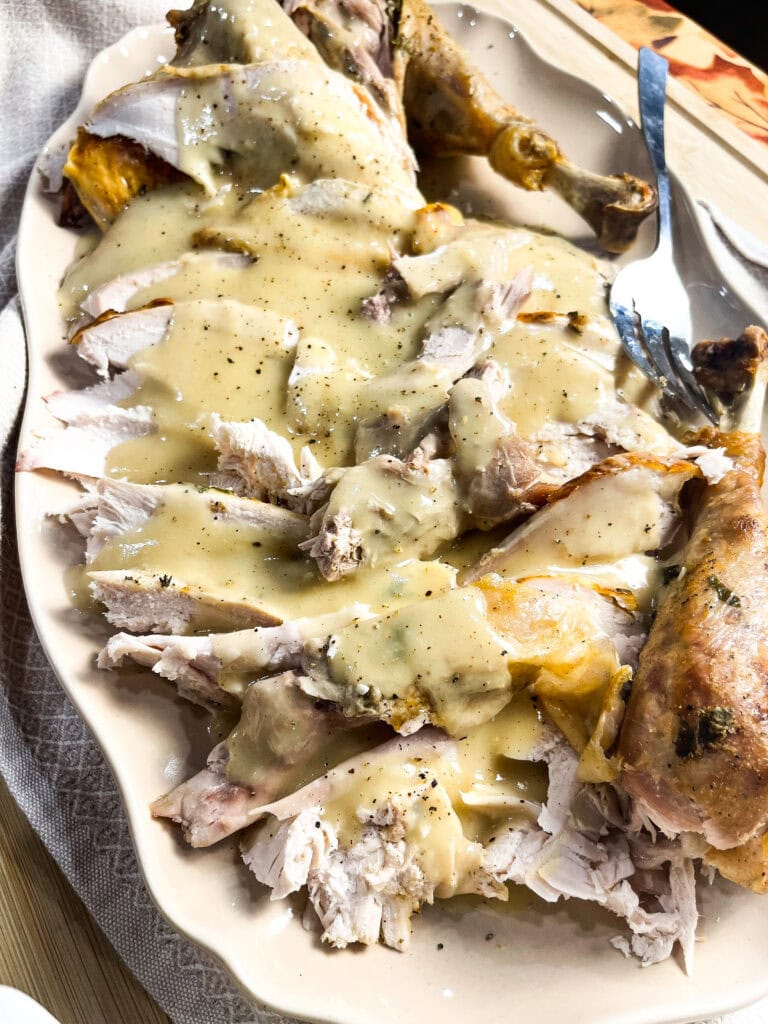
- Serve: Carefully cut the bag away from the turkey and remove the turkey to a serving platter to carve. Pour drippings into a fat separator, or a heat proof measuring cup, and let the fat rise to make the gravy.
Congratulations! You just made the most delicious Thanksgiving turkey! (hears distant cheering 📣)
⏱️ Estimated Cooking Times (at 350°F, in a Reynolds Bag)
| Turkey Weight | Approx. Cook Time |
|---|---|
| 12–13 lbs | 2¼ to 2½ hours |
| 13–14 lbs | 2½ to 2¾ hours |
| 14–15 lbs | 2¾ to 3 hours |
🕵️♀️ Tip: Always trust your meat thermometer over time charts. Turkey is safe to eat when it reaches 165°F in the breast and 175°F in the thigh.
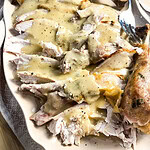
Step 7: Make the Gravy
Pour drippings from the bag into a fat separator or a heat resistant measuring cup and let the fat rise.
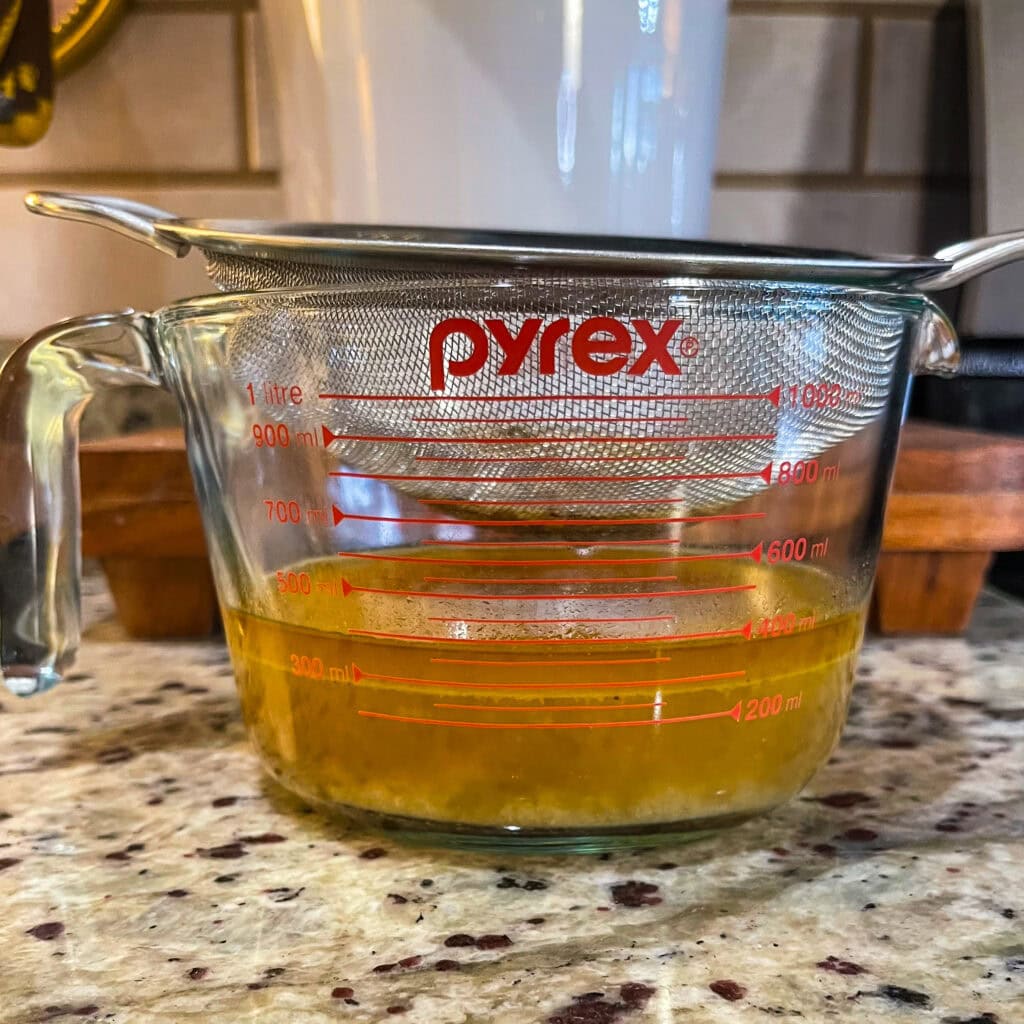
Measure ¼ cup of fat into a saucepan over medium heat. (discard the rest of the fat from the drippings) Whisk in ¼ cup flour and cook 2–3 minutes until golden.
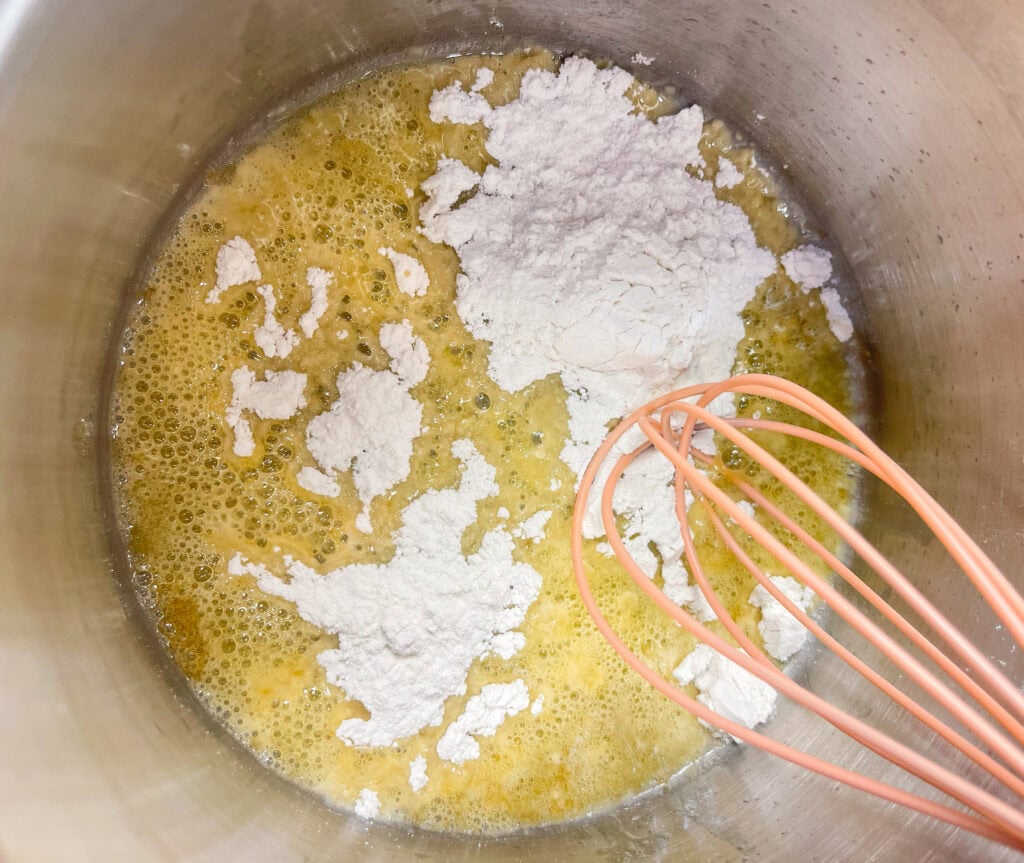
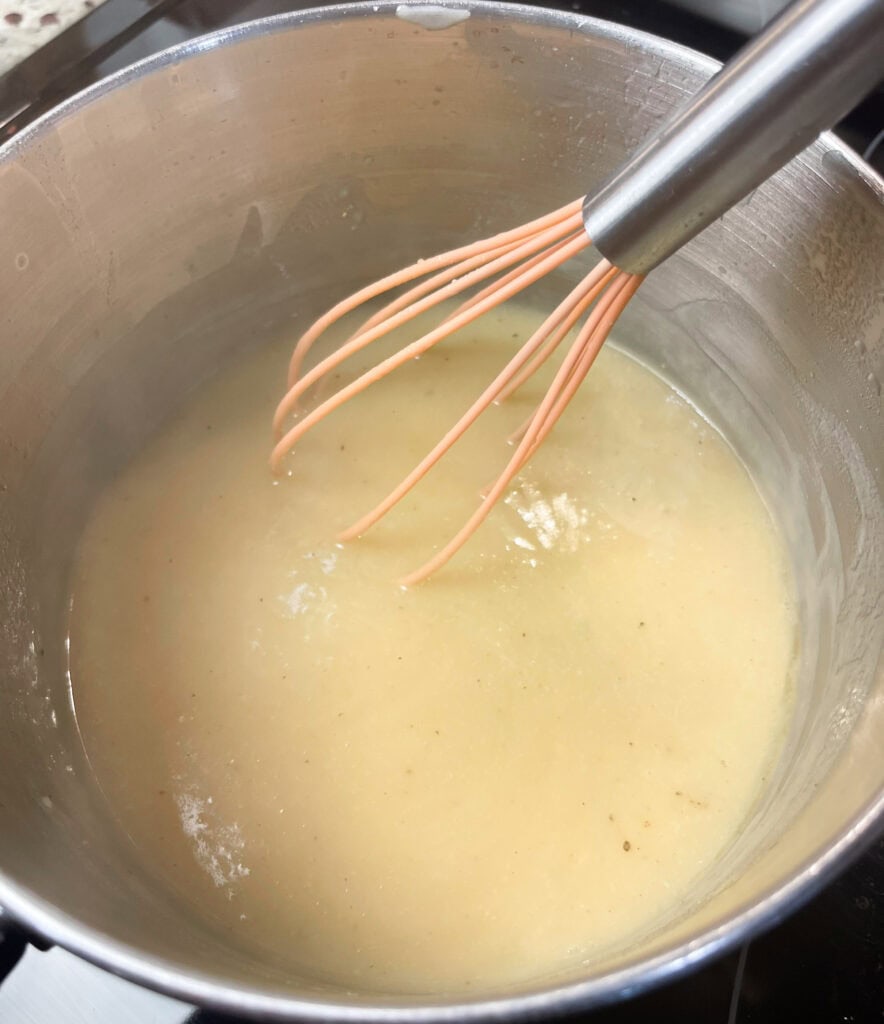
Slowly whisk in the drippings (without fat) and enough broth to make about 3 cups total until smooth.
Simmer 5–10 minutes, stirring, until thickened. Add the butter and season to taste. Drizzle your warm gravy over the carved turkey and feast!
Did you enjoy this recipe? Take a picture and tag me @StephGigliotti on social media and #StephRealLife. I would absolutely love to see your finished dish!
⭐ Please leave a 5-star rating in the recipe card below and/or a review in the comment section. 📌Save this recipe to make later and share with a friend!
FAQ’s
Q: Can I prep the turkey the night before?
Yes! You can butter and season the turkey, then cover loosely with foil or plastic wrap and refrigerate overnight. Let it sit at room temperature for 30–45 minutes before roasting.
Q: Do I need to baste the turkey when using an oven bag?
Nope! The oven bag locks in steam and moisture, so the turkey bastes itself while cooking.
Q: Can I stuff the turkey when using this method?
It’s best not to. Stuffing changes the cooking time and may cook unevenly. Bake stuffing separately.
Q: What if my turkey is larger than 15 pounds?
You can still use this method! Check the chart on the Reynolds bag box and rely on your thermometer for doneness.
Q: Can I make the gravy without a fat separator?
Yes — just let the drippings sit for 5–10 minutes and spoon off the fat layer that rises to the top.
Q: Can I use salted butter for the herb butter?
Yes, just reduce the added salt by about half.
Q: What if I don’t have an oven bag?
Roast uncovered in a large roasting pan. Tent with foil for the first half of cooking to keep moisture in, then remove foil for crispy skin.
Q: How do I know when it’s done?
Use your wireless meat thermometer — 165°F in the thickest part of the breast or thigh (not touching bone).
Q: How long does leftover turkey last?
Up to 4 days in the fridge or 3 months in the freezer in an airtight container.
Serving Suggestions
- Green Bean Casserole
- Crock Pot Mashed Potatoes
- Bacon Corn Casserole
- Crock Pot Glazed Carrots
- Roast Maple Acorn Squash
- Roasted Fall Vegetable Salad
- Zucchini Squash Casserole
- Scalloped Potatoes
- Pumpkin Slab Pie
🍽️ The Stress-Free Way to Make a Juicy Turkey
This method is practically Thanksgiving magic. The oven bag keeps your turkey juicy, the herb butter adds flavor and golden color, and the wireless thermometer takes the guesswork out of doneness. Add silky gravy, and you’ve got a stress-free, absolutely delicious holiday centerpiece everyone will love. Cheers to the best Thanksgiving dinner yet!
Sign up for our newsletter to get new recipes sent right to your inbox! Follow along with me on Instagram, Facebook, YouTube , Pinterest, and TikTok.
This post contains affiliate links
Juicy Oven Bag Turkey with Compound Butter & Homemade Gravy
Equipment
Ingredients
- 12-15 pound turkey thawed
- 1 cup unsalted butter, softened 2 sticks
- 1 ½ teaspoons kosher salt
- 1 teaspoon black pepper
- 1 ½ teaspoons garlic powder
- 1 teaspoon onion powder
- 1 teaspoon paprika smoked or regular
- 1 tablespoon fresh rosemary finely chopped (or 1 teaspoon dried)
- 1 tablespoon fresh thyme finely chopped (or 1 teaspoon dried)
- 1 tablespoon fresh parsley finely chopped (or 1 teaspoon dried)
- 1 tablespoon fresh sage finely chopped (or 1 teaspoon dried)
- 1 teaspoon lemon zest optional
- 1 medium onion halved or quartered
- 1-2 lemons halved (zested first)
- 1 bouquet fresh herbs parsley, thyme, sage, rosemary — tied with twine
- 1 Tbsp flour for oven bag
- Cooking spray
- Pan drippings from turkey
- ¼ cup reserved fat
- ¼ cup all-purpose flour
- 2-3 cups turkey or chicken broth
- 3 Tbsp butter
- Salt & pepper to taste
Method
- Step 1: Thaw the Turkey- Allow 24 hours of fridge thawing per 4–5 pounds of turkey. (15 lb = about 4 days) Keep the turkey in its original packaging on a rimmed tray to catch drips.
- Step 2: Remove the turkey from packaging over the sink. Take out the neck and giblet bag from both cavities.
- (Optional) Rinse inside and out with cold water, then pat completely dry — dry skin = crispy skin!
- Step 3: Loosen the Skin-Gently slide your fingers under the skin over the breast and thighs, creating little pockets for butter. Work slowly to avoid tearing.
- Step 4: Add Aromatics: Skip traditional stuffing for this method (it changes cooking times).
- Fill the cavity with zested lemon halves, 1 medium onion, halved or quartered, and a fresh herb bouquet of parsley, sage, rosemary and thyme tied with kitchen twine.
- Step 5: Make the Compound Butter- In a medium bowl, mix together: Butter, lemon zest, salt, pepper, garlic powder, onion powder, paprika, thyme, sage, and rosemary. Rub half under the skin and half over the outside of the turkey. Tuck wings under and tie legs with kitchen twine.
- Step 6: Roast in an Oven Bag-Preheat oven to 350°F.
- Spray the inside of the Reynolds Oven Bag lightly with cooking spray. Add 1 Tbsp flour to the bag and shake to coat. (This prevents the turkey from sticking to the bag)Place the bag in a large roasting pan and add the turkey breast-side up. Seal the bag with the included tie. Cut six ½-inch slits in the top to vent. Insert a wireless meat thermometer into the thickest part of the breast or thigh (not touching bone). Roast until the thermometer reads 165°F, about 2-3 hours. No basting needed! The oven bag locks in moisture.
- Let the turkey rest in the bag for 20–30 minutes before carving.
- Carefully cut open the bag, transfer the turkey to a platter, and carve.
- Step 7: Make the Gravy: Pour pan drippings into a fat separator or measuring cup and let fat rise. Measure ¼ cup fat into a saucepan over medium heat. Whisk in ¼ cup flour; cook 2–3 minutes until golden. Slowly whisk in 2–3 cups drippings/broth until smooth. Simmer 5–10 minutes, stirring, until thickened. Add butter and season with salt and pepper to taste.
- Serve your delicious carved turkey with warm homemade gravy and enjoy!


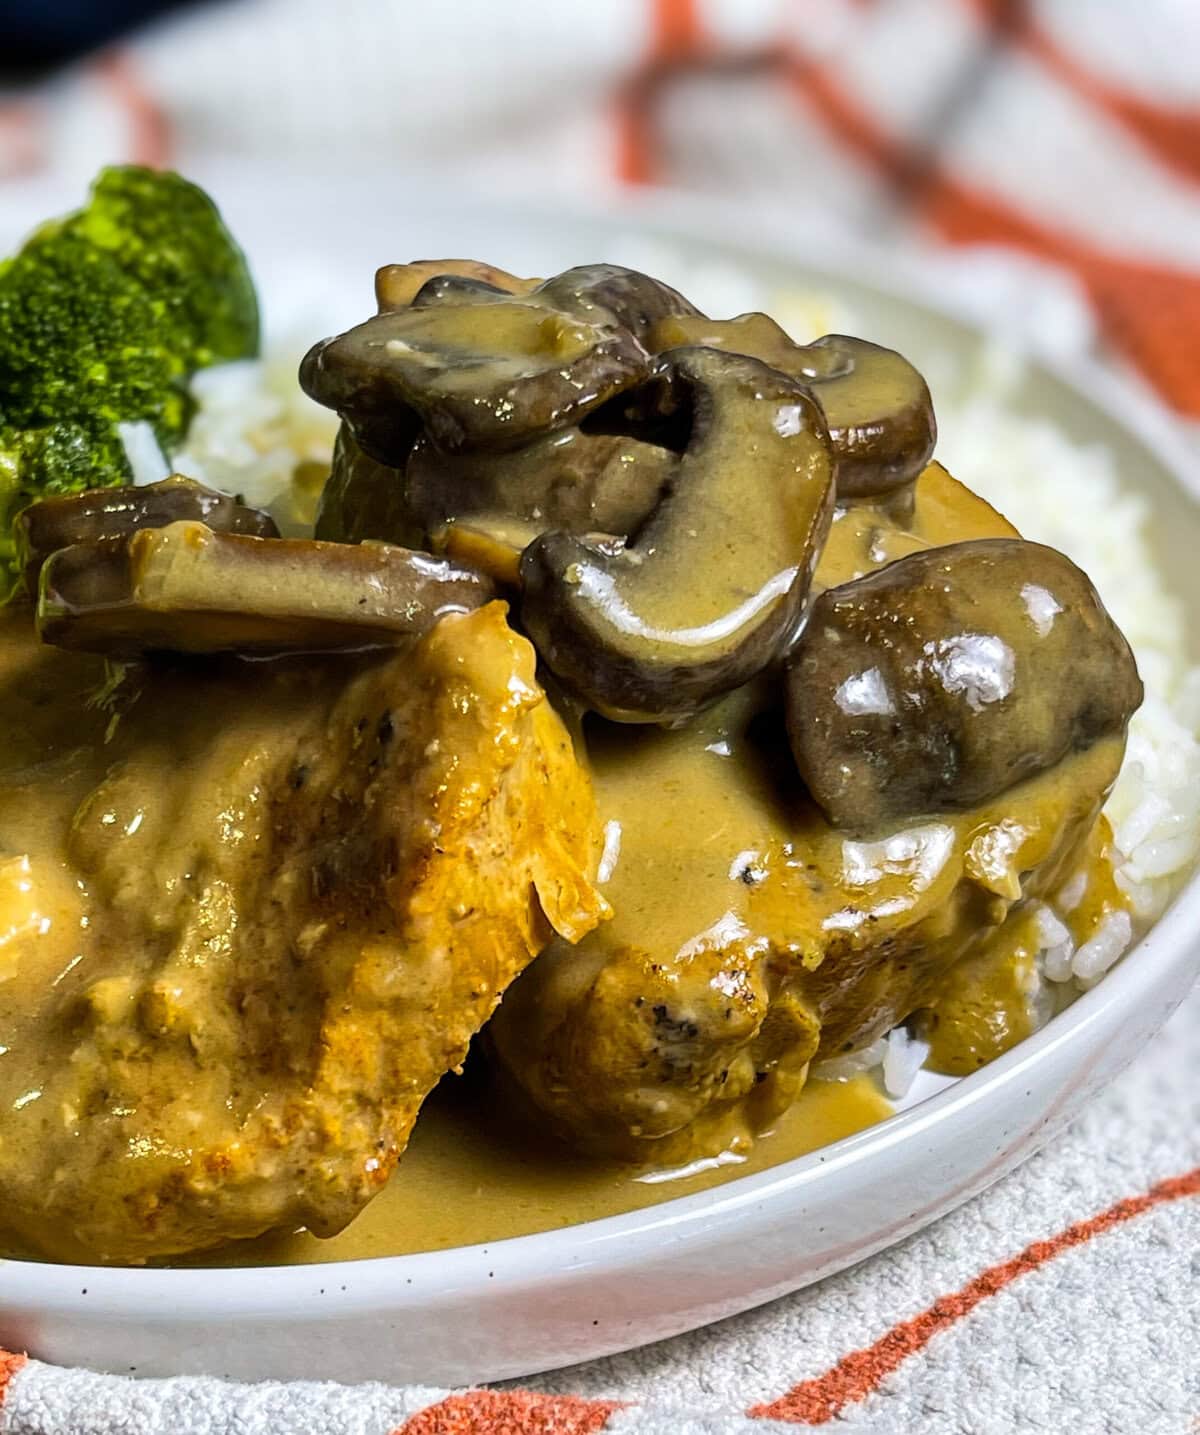

This turkey came out perfect
Yay!